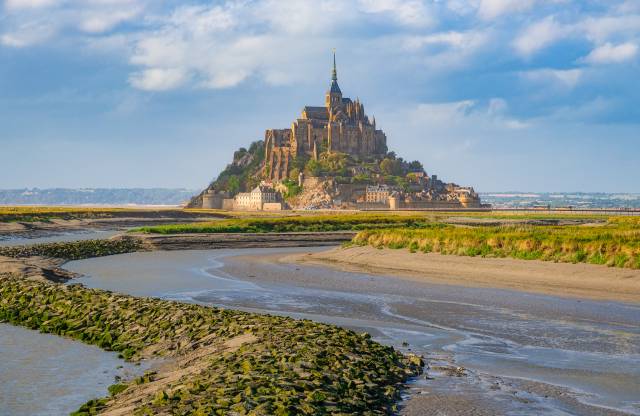
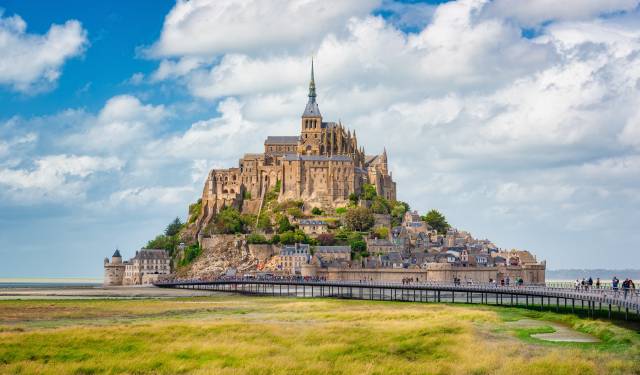
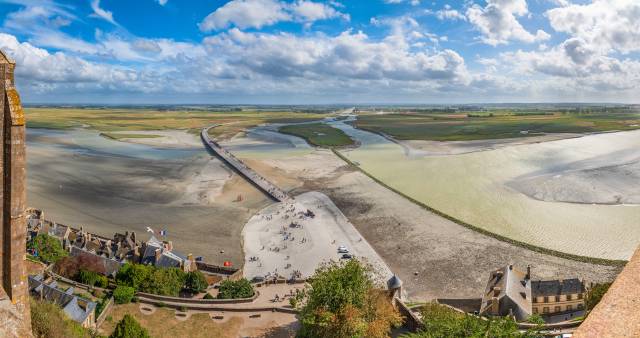
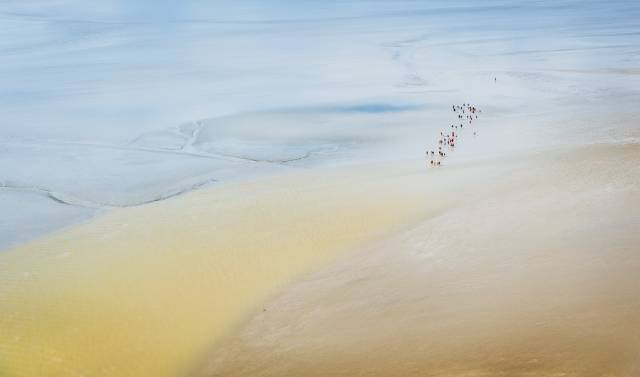
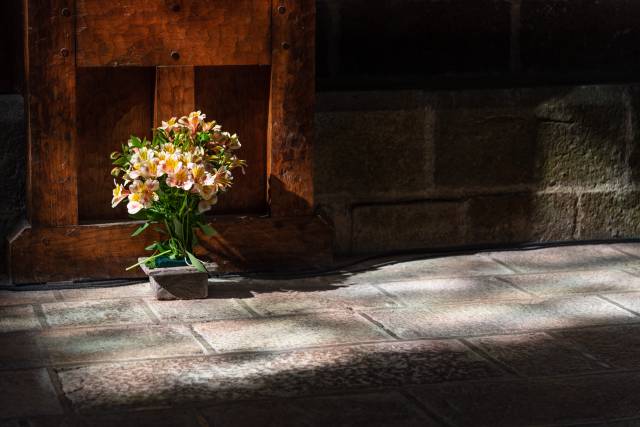
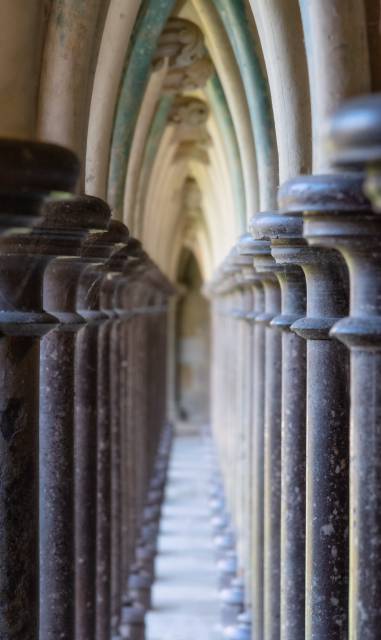
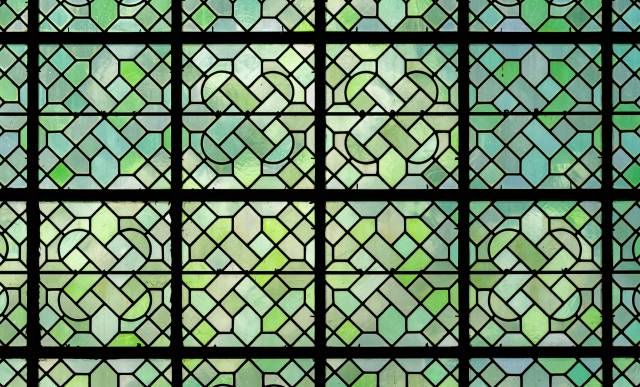
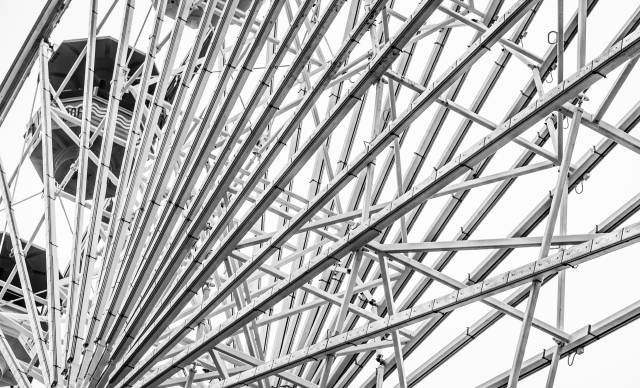
Stop I: Le Mont-Saint-Michel
The famous monastery island Le Mont-Saint-Michel is one of the must-sees when going to this are of France. Despite being packed with tourists, it’s still a worthwhile and impressive destination for a day trip and sometimes one can even find some quiet spots, especially later in the afternoon when most groups depart.


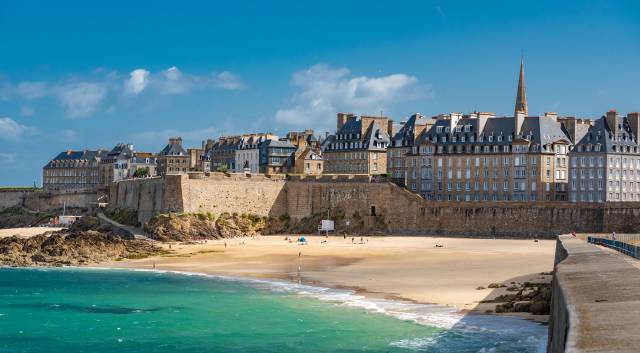
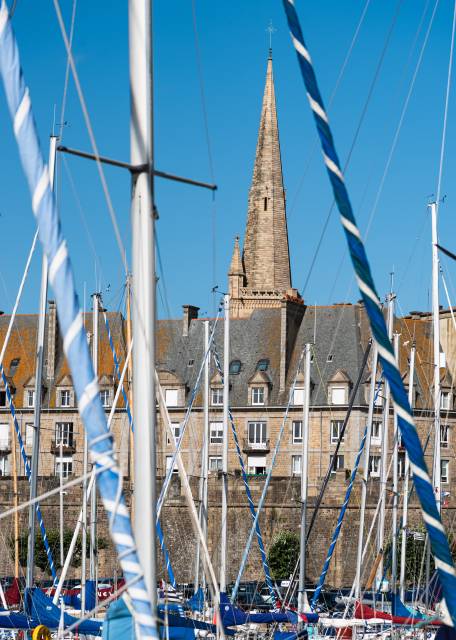
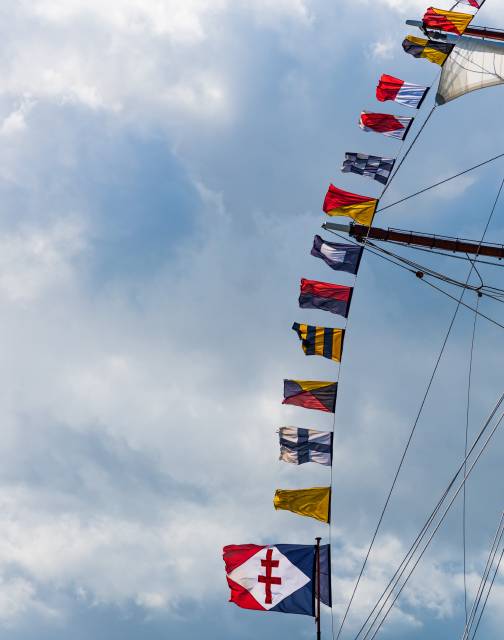
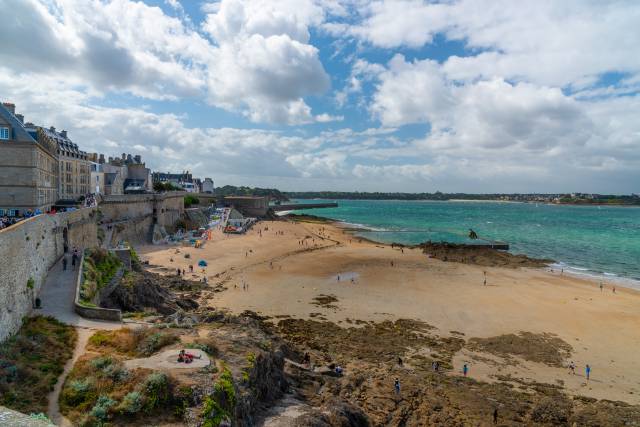
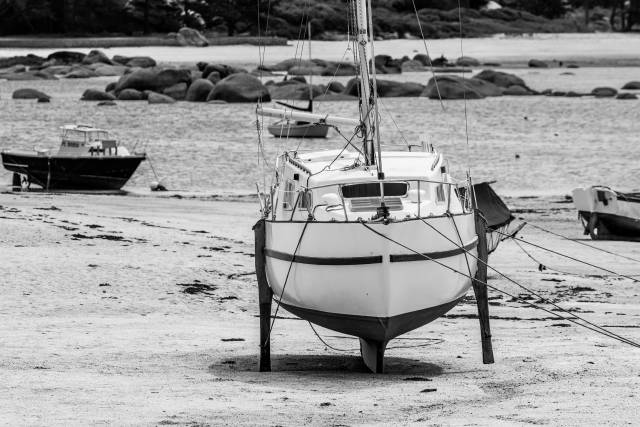
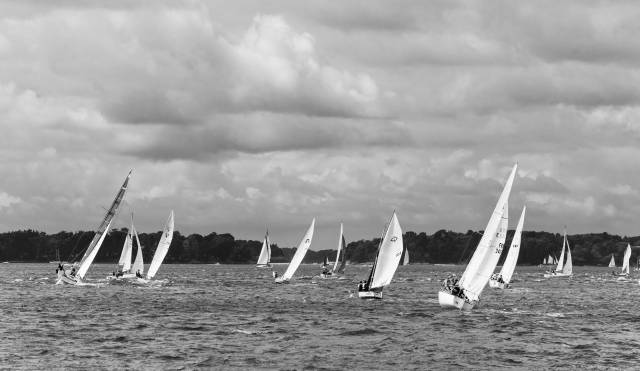
Stop II: Saint-Malo
Saint-Malo is a picturesque city with wonderful old houses, narrow streets, fortifications, and a distinct city shape due to the city completely filling a peninsula. Along the borders of the old city center large harbors are filled with yachts.


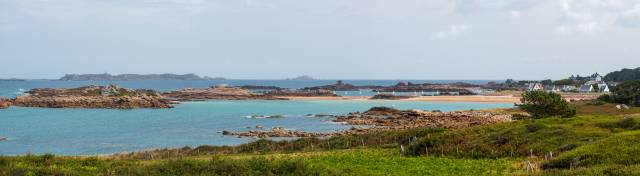
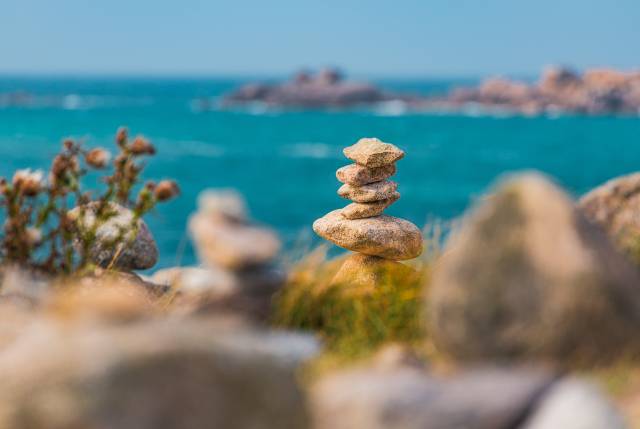
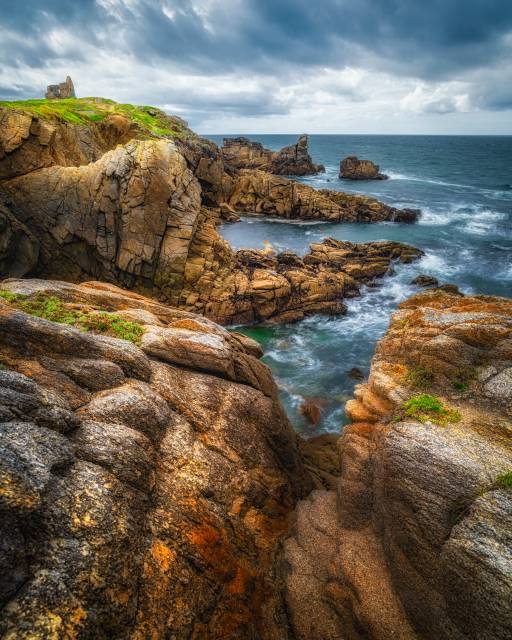
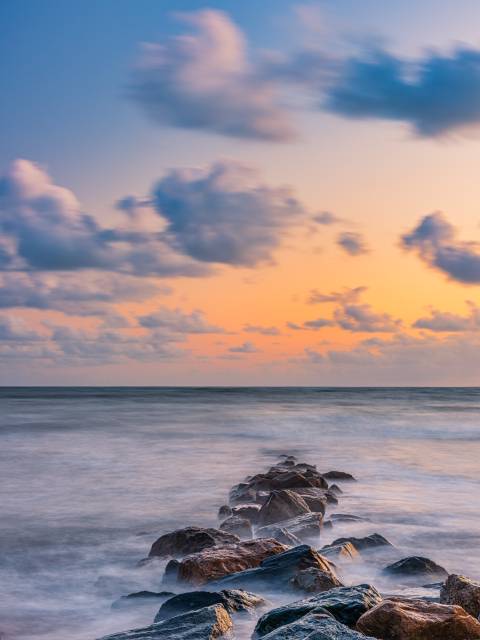
Stop III: Côte de Granit Rose
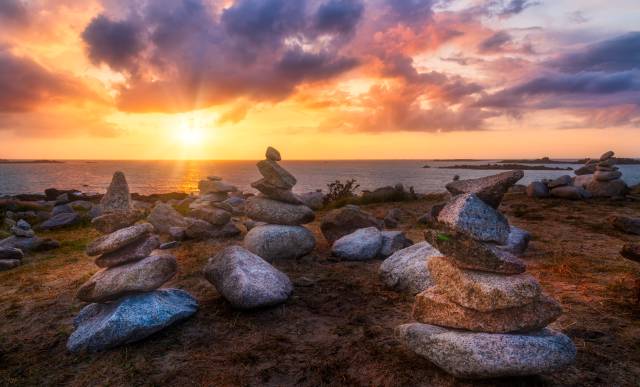
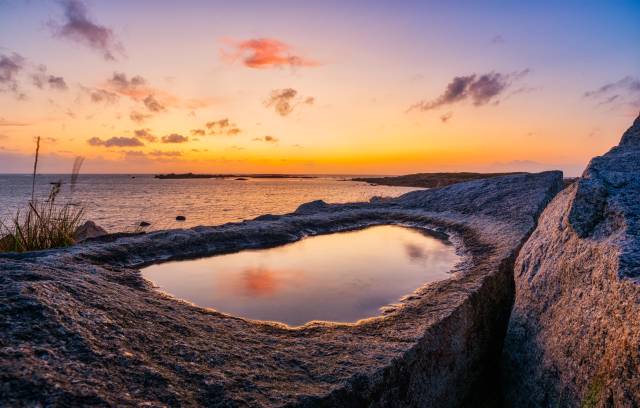
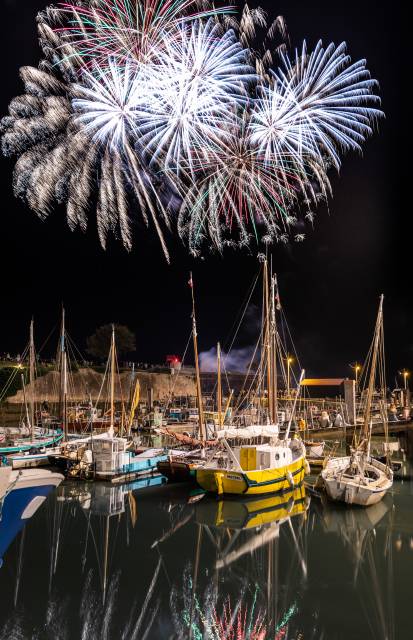
Our next stop was the famous Côte de Granit Rose with its distinctly colored rock formations. We found a simple but perfectly located camping ground at Landrellec for this stop (Camping Municipal de Landrellec). Just a few feet away from the beach and a coastal hiking trail this was a great opportunity to enjoy the sunset out in the nature without needing a long walk back to the tent afterwards.


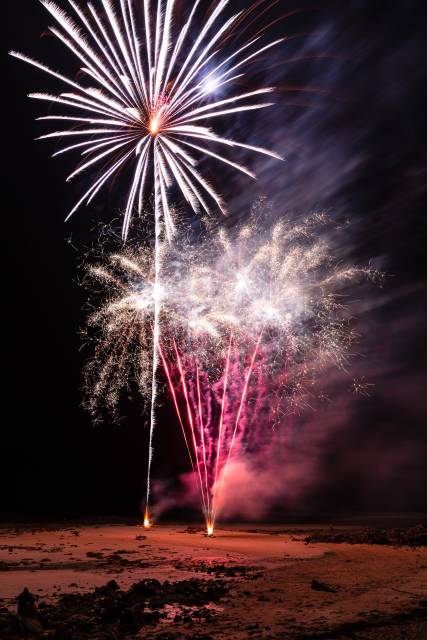
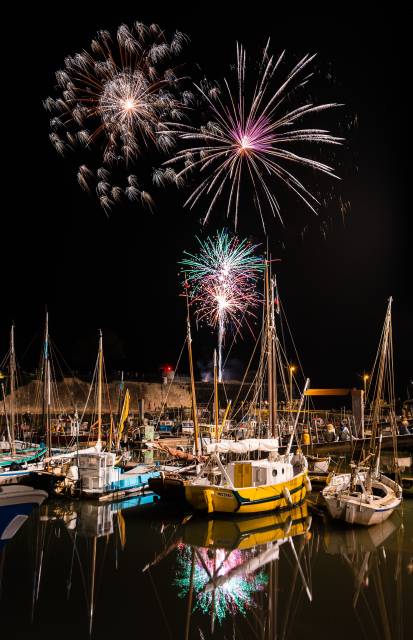
Since we travelled at the end of the French summer holiday seasons, we were also surprised by many public festivities. In Landrellec we ended up at a harbor festival. At night, this festival surprised us with spectacular fireworks launched directly from the tideland. We didn’t expect to see more of them at that time.


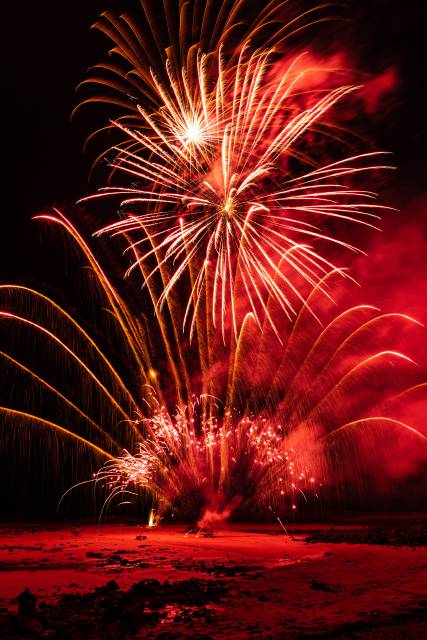
In the end, Landrellec was a very nice spot and we probably should have stayed longer instead of rushing further west towards the tip of the Crozon peninsula.
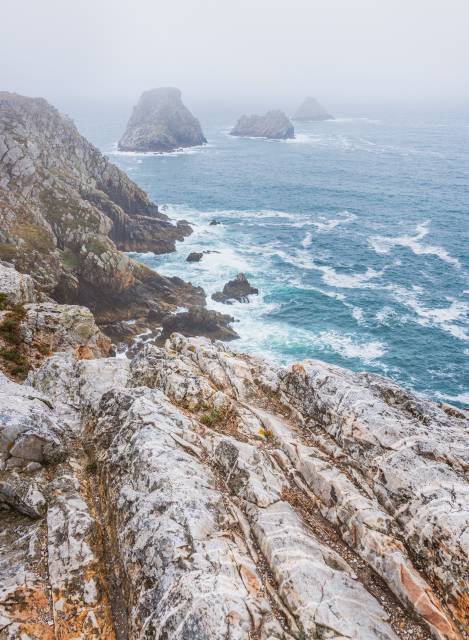
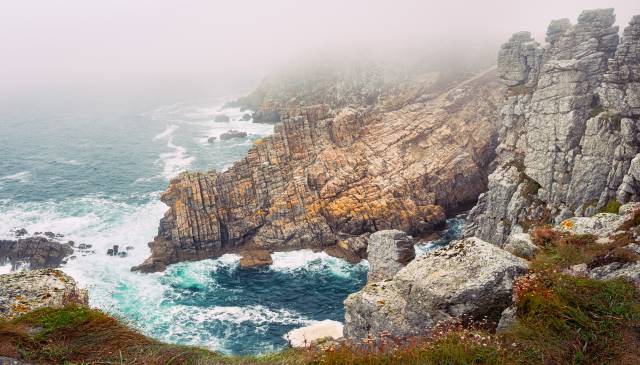
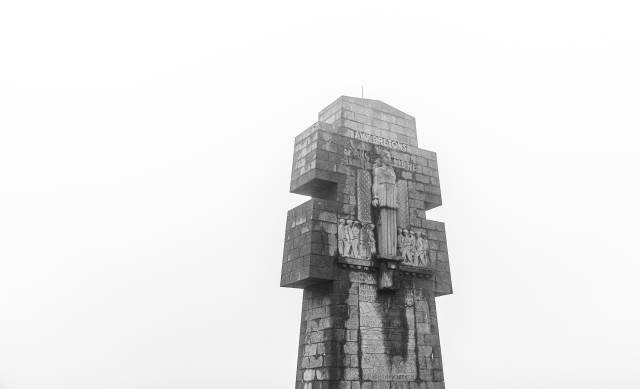
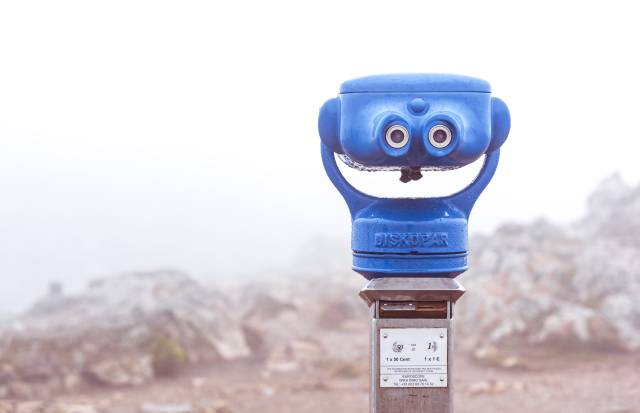
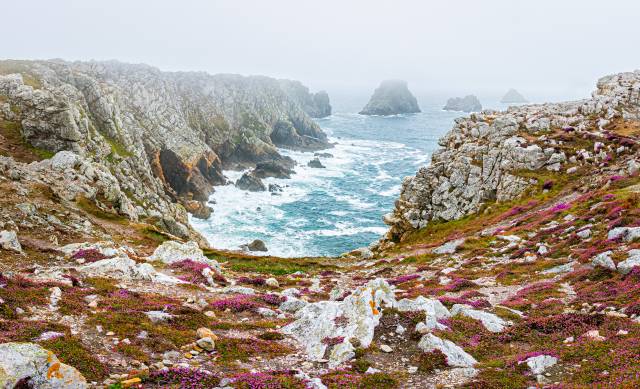
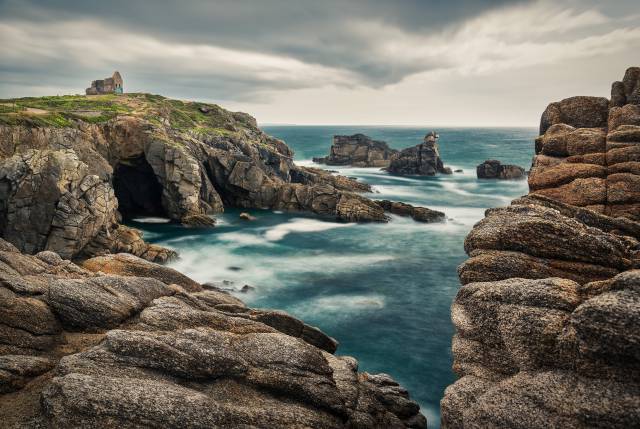
Stop IV: Crozon at Camaret-sur-Mer with Pointe de Pen-Hir
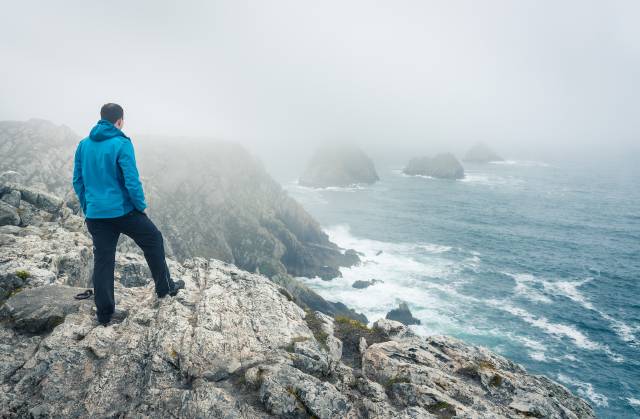
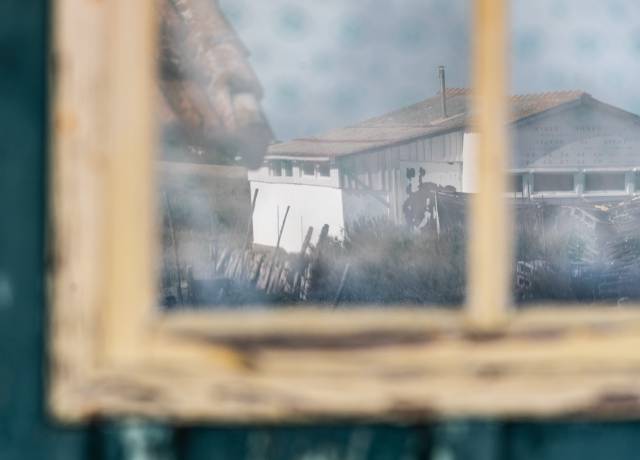
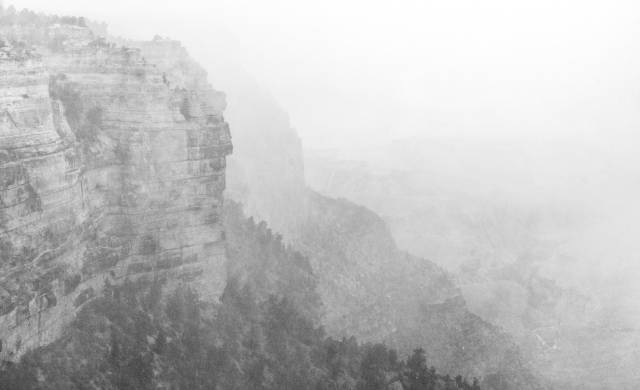
Our next stop was the very tip of the Crozon peninsula at Camaret-sur-Mer. This is a pretty spectacular place with rough cliffs and strong winds. Unfortunately, the weather got pretty bad after one day. So we only stayed one night.
After the beautiful weather in the evening, rain and fog rolled in from the sea and the next morning we visited the famous Pointe de Pen-Hir in heavy fog. This resulted in some very special and moody images.


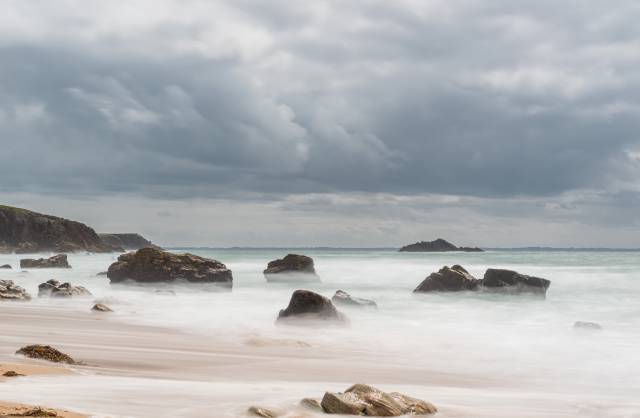
Stop V: Gulf of Morbihan and Quiberon peninsula
After the bad weather we headed further south and - more or less by accident - added an unplanned stop close the gulf of Morbihan. We found a lovely eco camping ground off the coast in between fields and had a good time there despite some more rain throughout the days we stayed there.
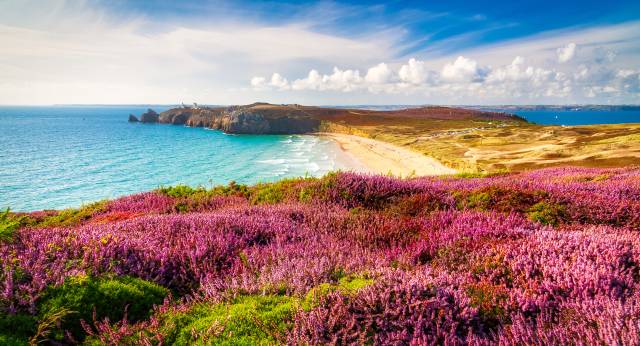
Although the gulf is pretty nice, our highlight at this stop was the Quiberon peninsula with its wonderful coastline.


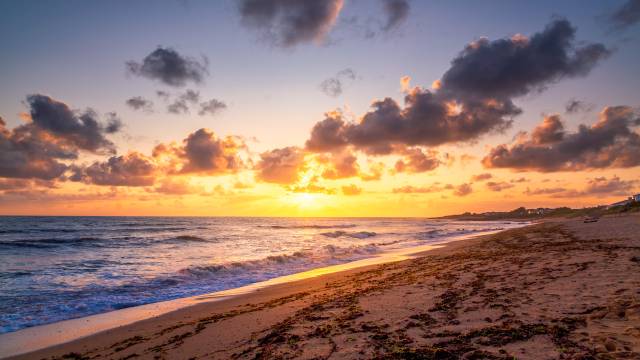
Stop VI: Île d’Oléron
After all the rainy days, we decided to head further south to increase the chance for sunny days. We left Brittany and chose our final destination to be Oléron island, conveniently reachable with a bridge. The nature at Oléron is a lot less exciting and therefore we could use the remaining days mostly for relaxing at the beach, drinking some local white wine.


Again, we found a harbor festival with fireworks.


Phuket
Our trip started at the airport in Phuket and a hotel in the city center.


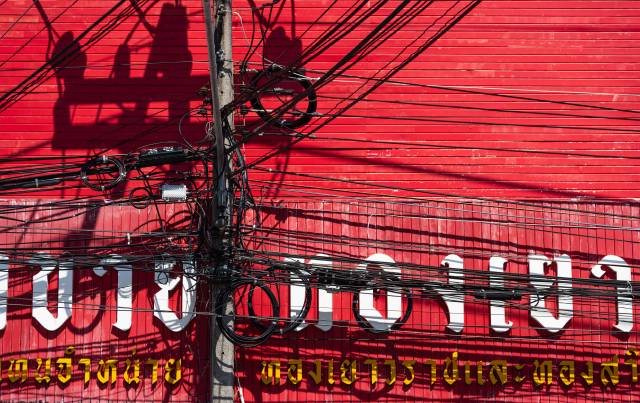
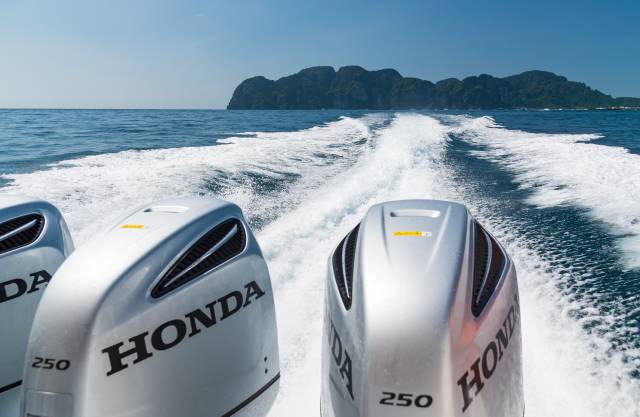
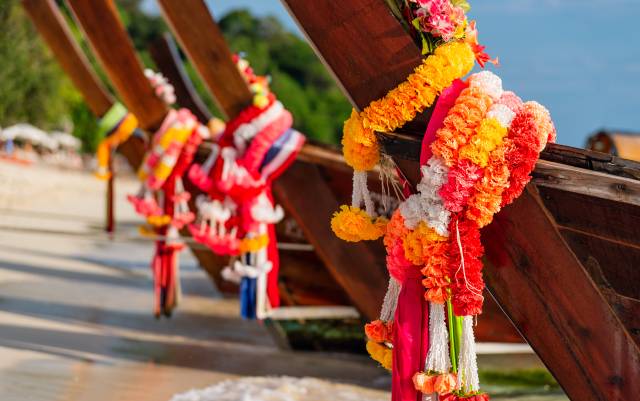
We only spent one night there an had a brief look at the slightly chaotic city before heading towards Ko Lanta, the only destination we booked in advanced. Going to Ko Lanta was our first trip with one of those crazy speed boats, which are advertised by the number of engines.
Ko Lanta
In contrast to many of the more popular islands in the Andaman Sea, Ko Lanta is one of the slightly lesser known ones. It is a quite large island without the distinctive karst formations the surrounding islands are known for. This results in a low density of tourists and a very relaxed feel to the island. We spent our time on Ko Lanta in Klong Khong and immediately extended the planned time there just because the atmosphere was so much relaxing.

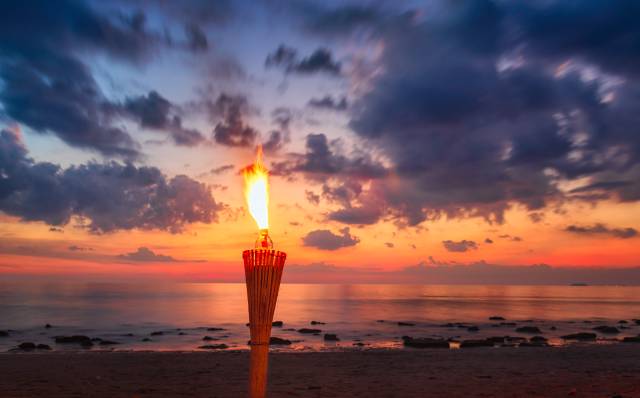
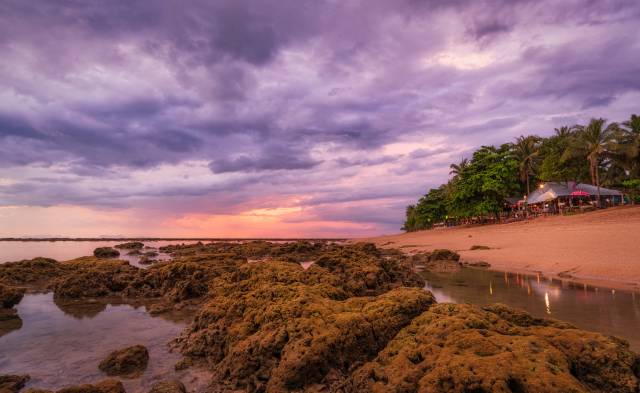
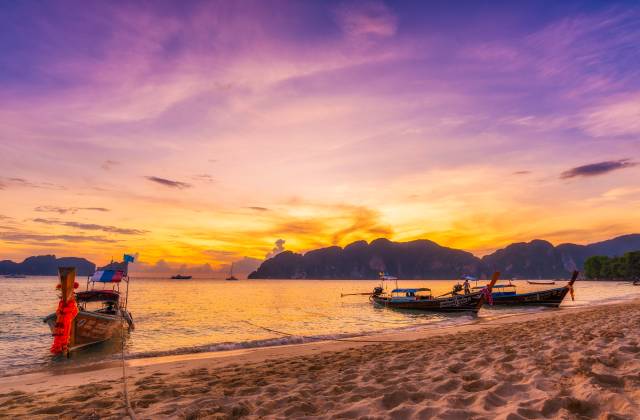
You can spend some nice time at Klong Khong’s beach bars while watching the sunset.


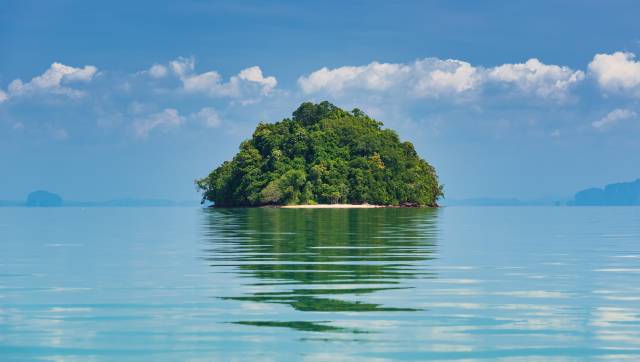
One of the interesting things we did on Ko Lanta was renting a boat with a guide for a day to visit some of the smaller islands surrounding Ko Lanta.


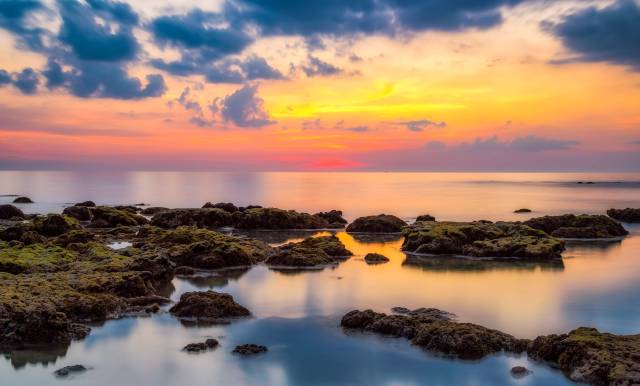
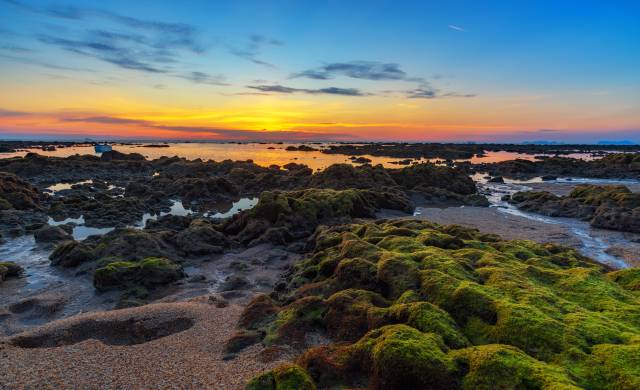
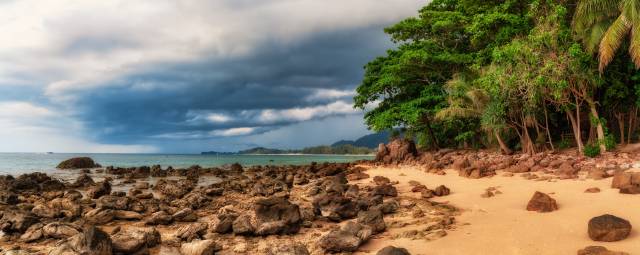
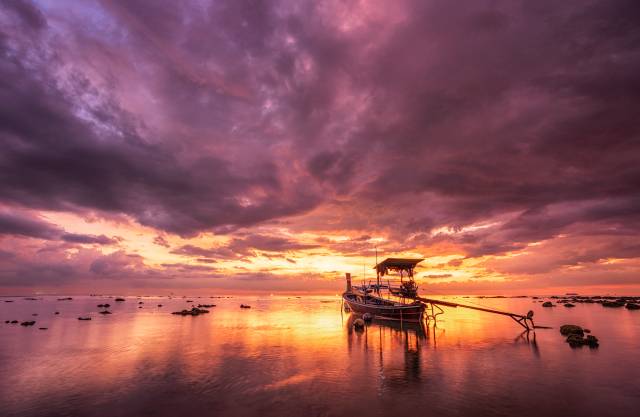
While Klong Khong beach is nice for relaxing at one of the bars, swimming is not easy due to many rocks. Of course, we also visited other beaches better suited for swimming. At the occasion below, a thunderstorm moved in.
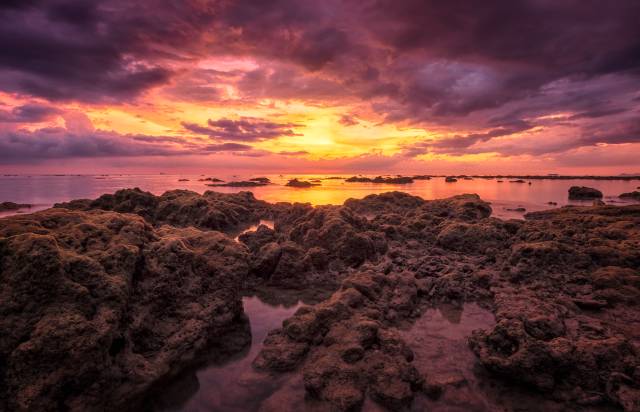
After bringing a lot of rain, the thunderstorm also brought a wonderful sunset for our last evening at the island.


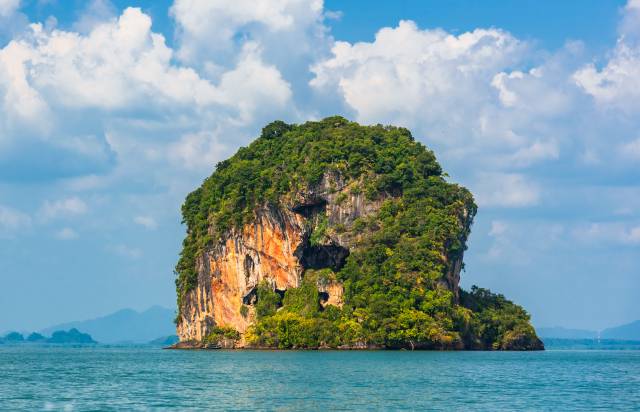
Ko Phi Phi
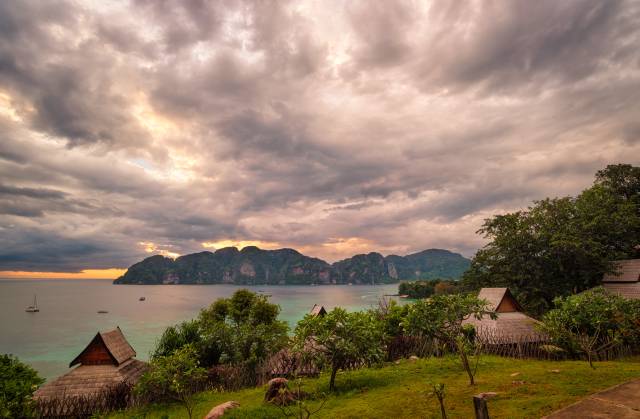
After the relaxing Ko Lanta, we decided to head over towards Ko Phi Phi for two nights. Despite knowing that this place is extremely touristy and overrun, the distinctive karst formations of this island group are what makes it that interesting and we somehow accepted the amount of tourists to get an impression of the nature there.
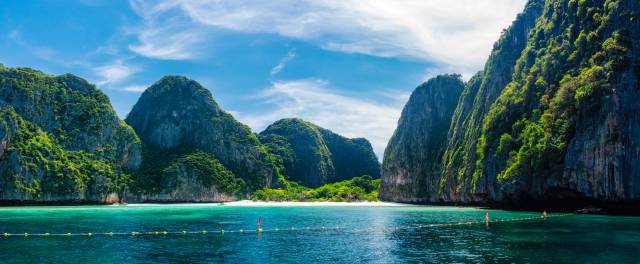


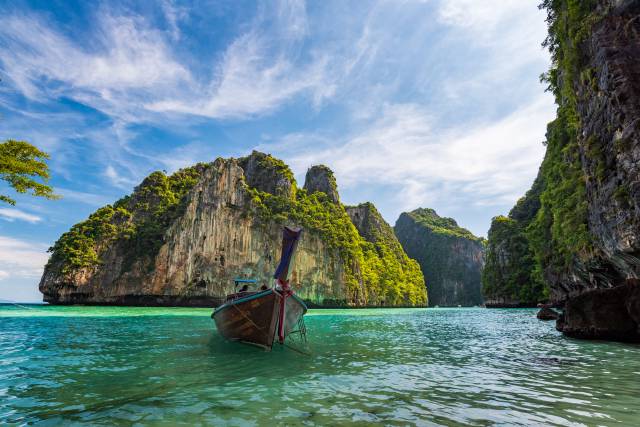
In the end, we probably wouldn’t visit Ko Phi Phi again. The village is just a huge number of shops, bars, and drunk tourists and the nature really struggles with the amount of tourism.
Ko Lipe
After the extremely crowded Ko Phi Phi we headed towards Ko Lipe. Despite being well established as a tourist destination, Ko Lipe has more space and you can still find quiet spots on this island. The speed boat ride there takes some hours.
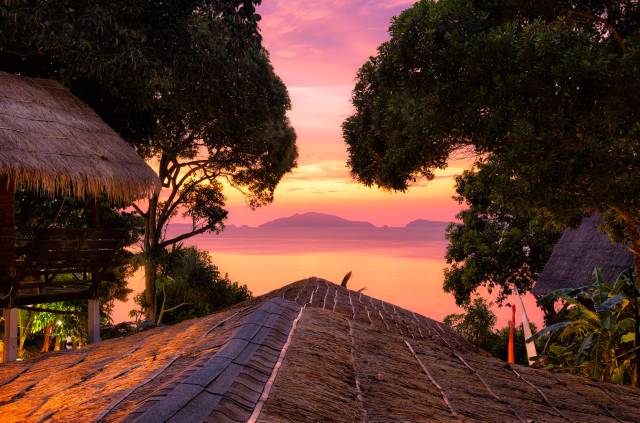
We spent the time on Ko Lipe in the relaxing Pitiusas Beach Resort with just a handful of bungalows at the sunset beach side of the island. The hotel as has a nice little beach, which gives direct access to the huge coral reef of the island.


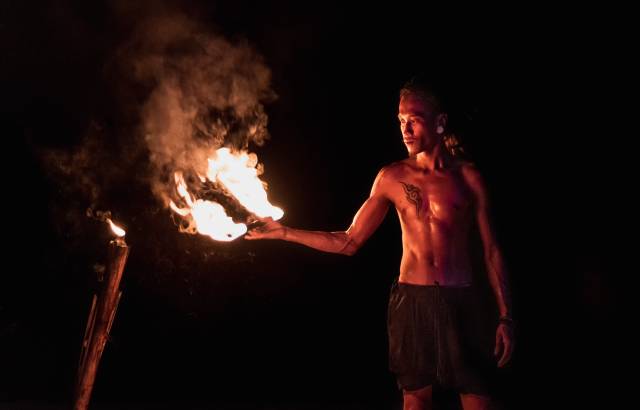
Like on the other islands, many of the beach bars try to attract visitors with fire spinning shows.
Slowly heading back to Germany
Before heading back to Germany, we spent two more nights on the very calm island Ko Yao Yai, mainly for relaxing. This was well deserved after the long, shaky, cold, and wet speed boat ride back from Ko Lipe. No fancy photos to show from this island apart from the hotel pool 😉.

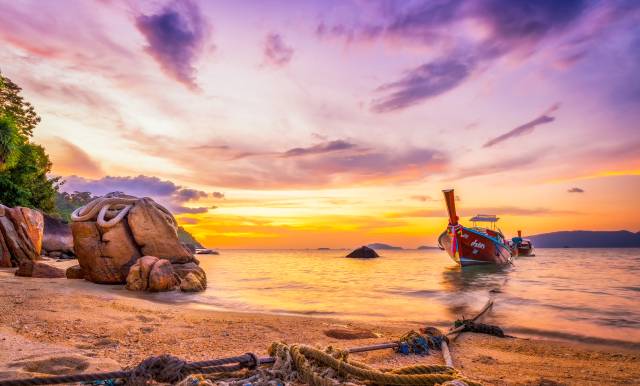
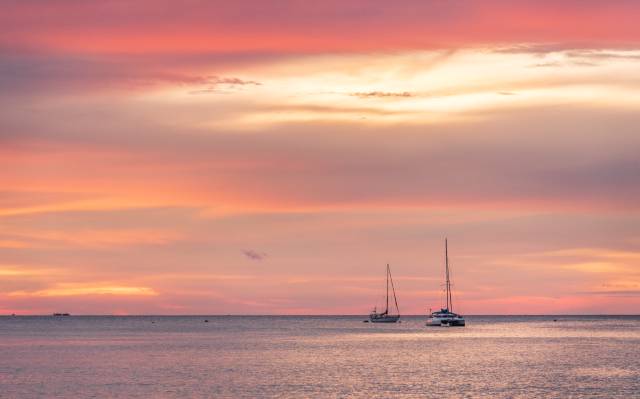
Before entering the airplane back to Germany, a wonderful sunset at a beach close to Phuket airport finalized our Thailand trip.


Los Angeles
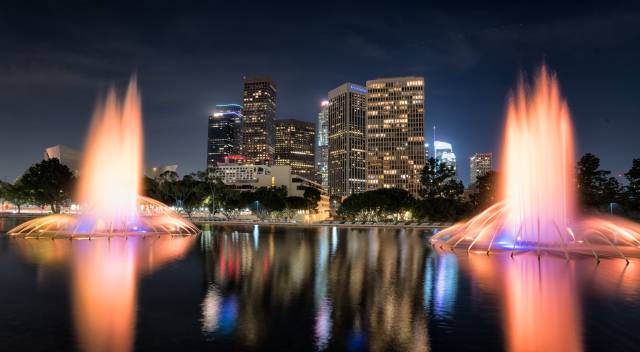
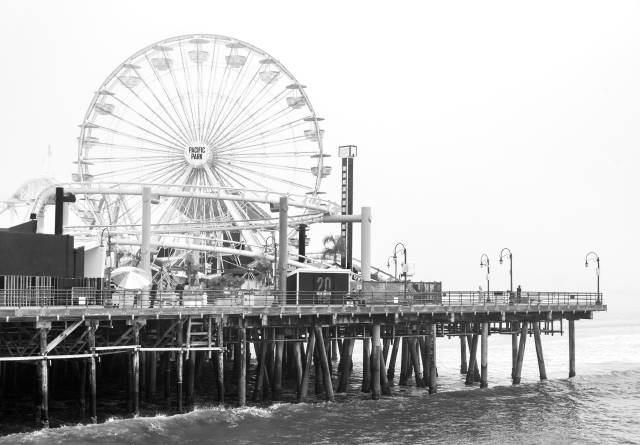
Starting point of the road trip following a conference was Los Angeles.


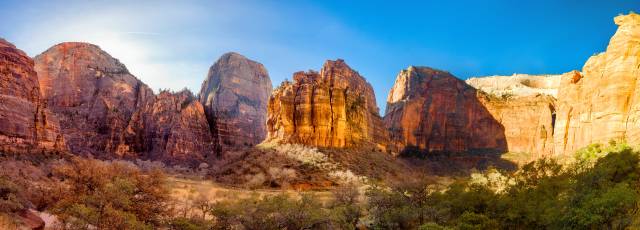
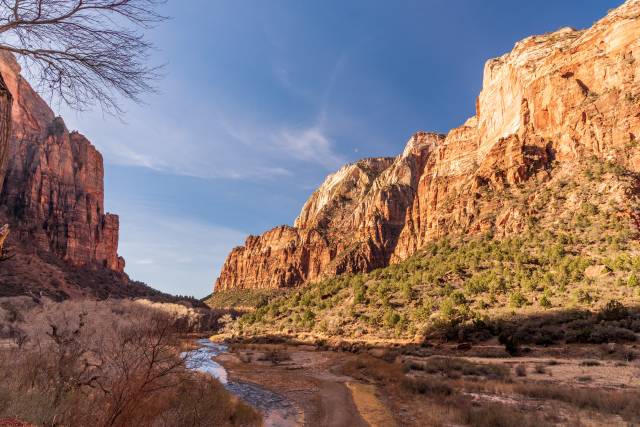
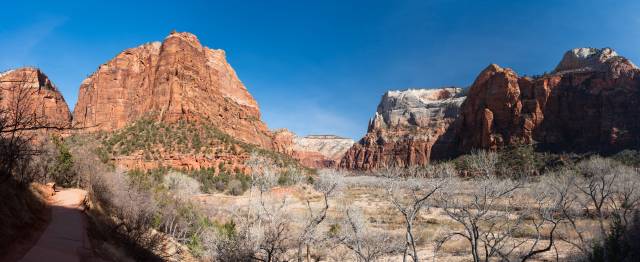
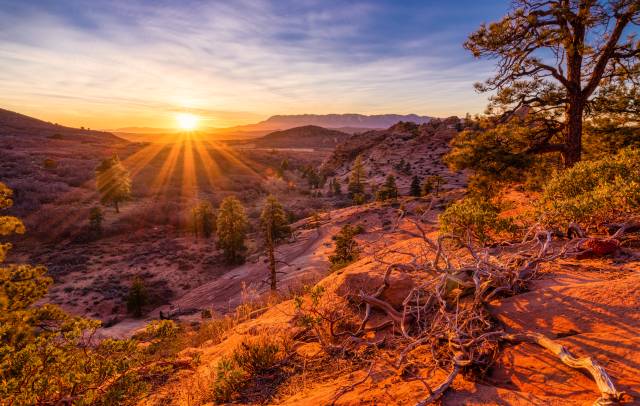
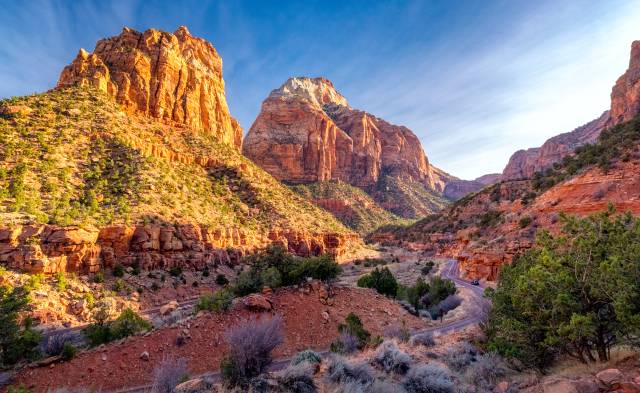
Zion National Park
The first national park along the route was Zion. This national park is a nice contrast to the others that followed because the nature is extremely pretty but the park is not that crowded compared to the more famous ones.
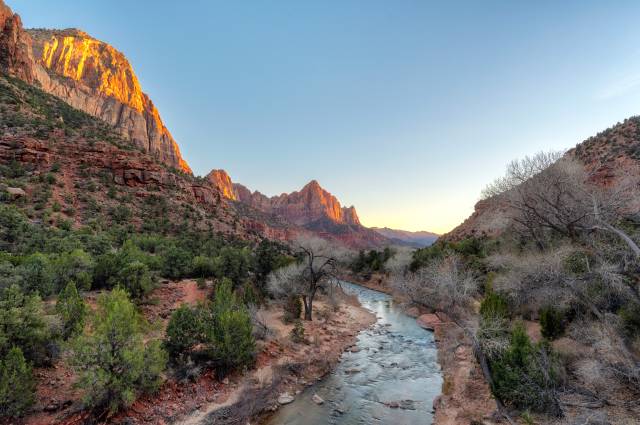


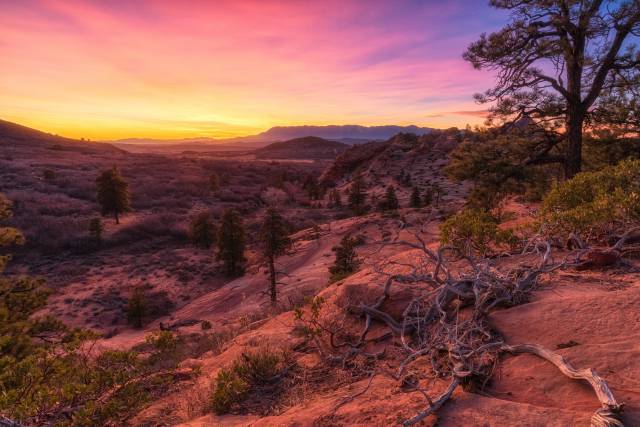

Not only the valley at Zion is pretty. Along the Kolob Reservoir Road you can also find some pretty nice spots to watch the sunset.
From Zion we headed towards Bryce Canyon. To get there, you have to follow the Zion Mount Carmel Highway that winds up Pine Creek Canyon.
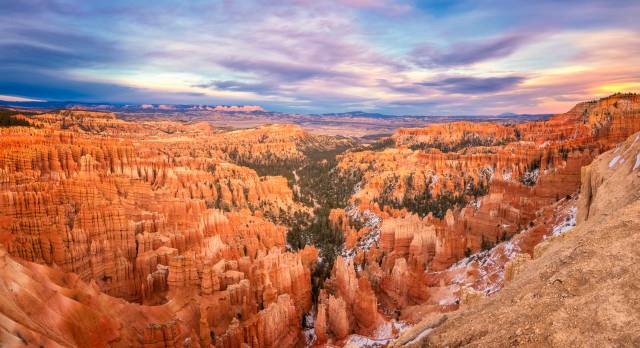
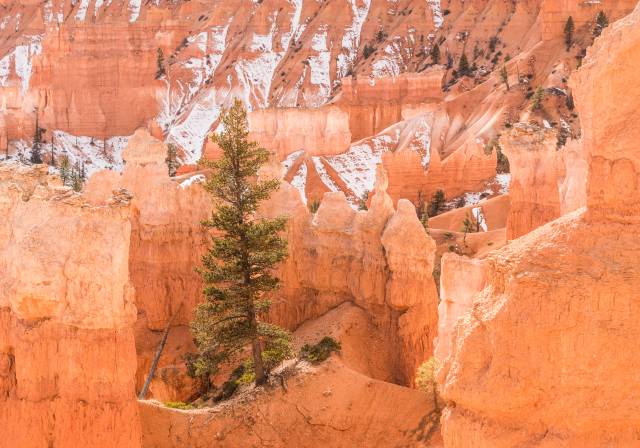
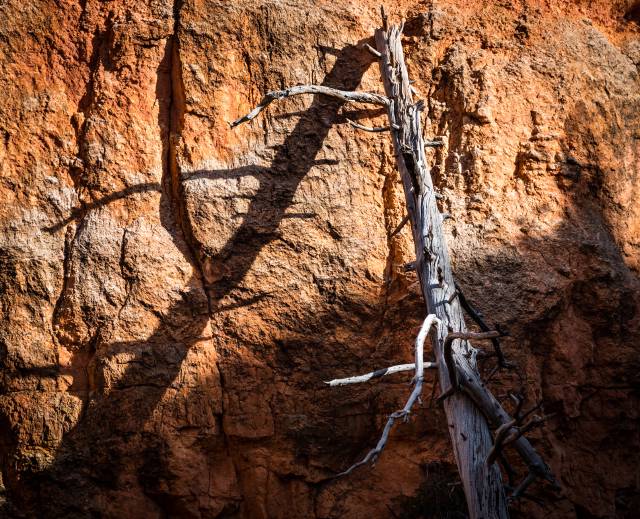
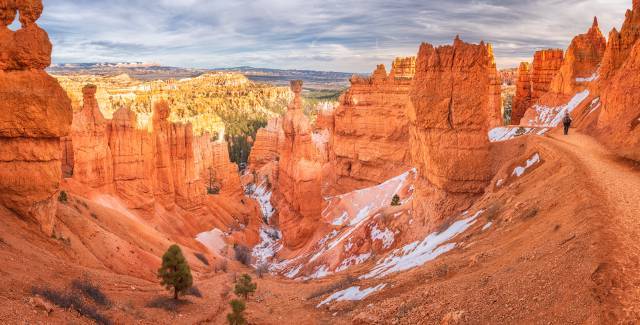
Bryce Canyon
Bryce Canyon was probably the most impressive experience. Unfortunately, we only had a single day to visit it. The next day, the forecast indicated snow and with a rental car with only summer tires we decided to better leave early.


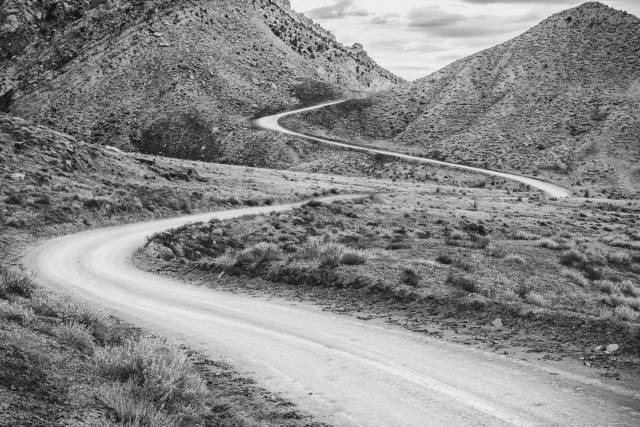
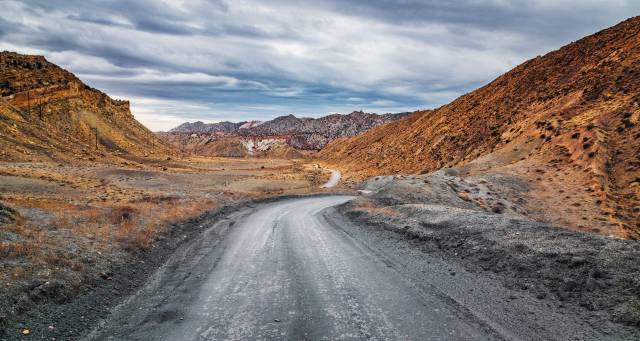
From Bryce Canyon to Page
From Bryce Canyon we continued to Page with its various attractions nearby. Despite the bad weather forecast and adventurous stories found on the internet, we decided to take the Cottonwood Canyon Road. We made it without getting stuck.


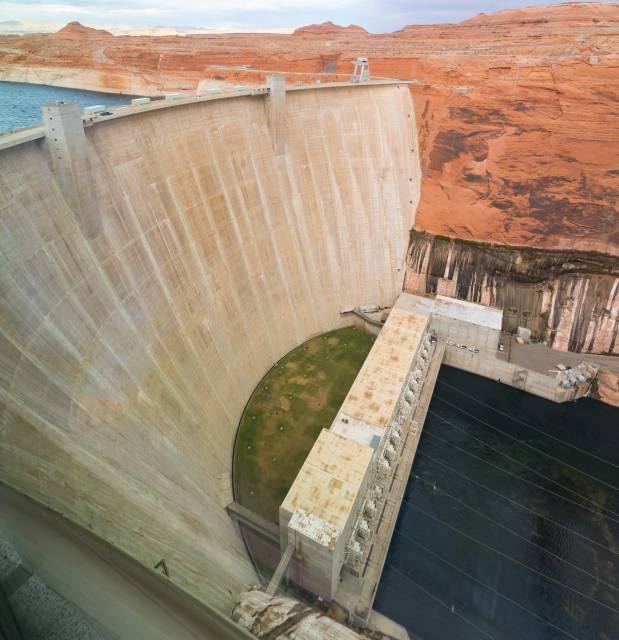
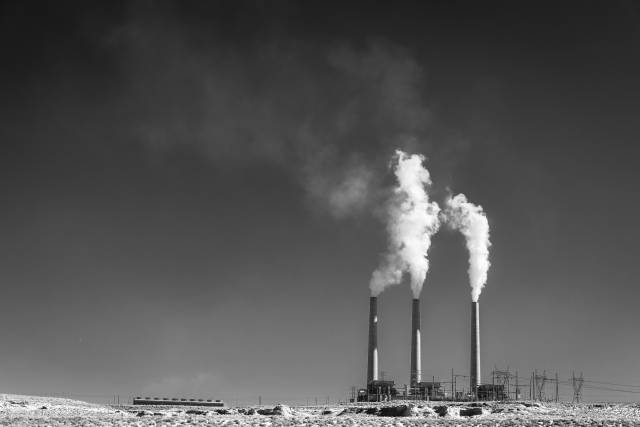
Close before Page, one passes the impressive Glen Canyon Dam
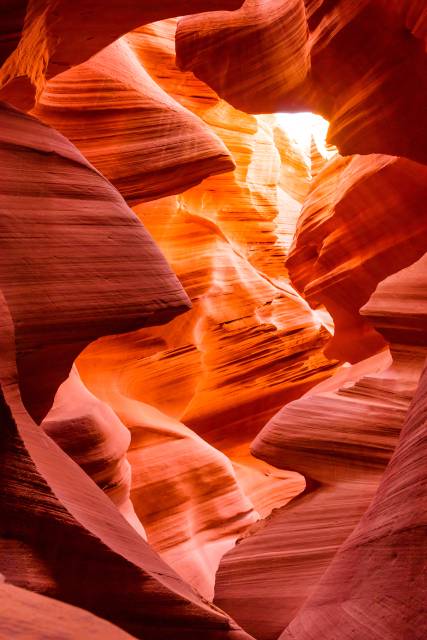
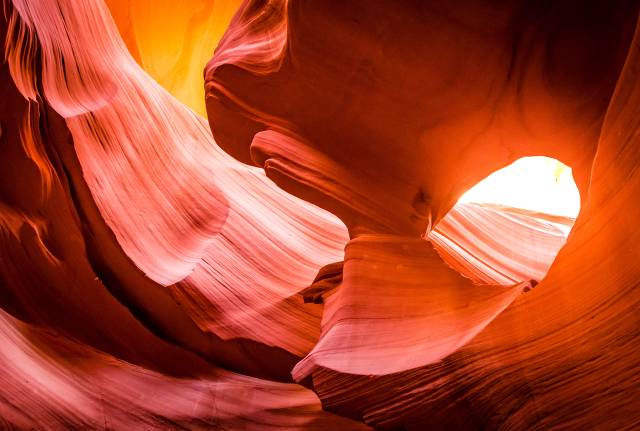
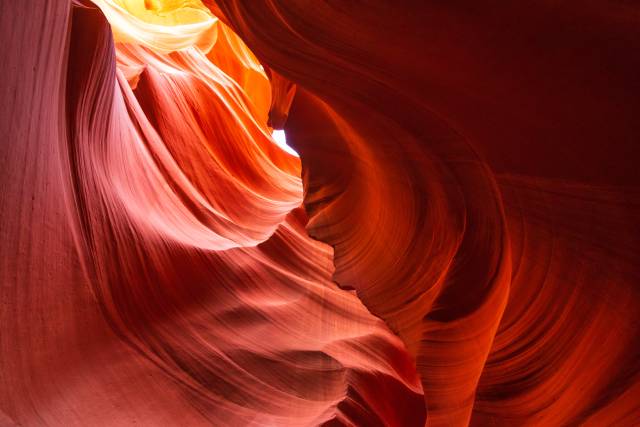
Around Page: Horseshoe Bend and Antelope Canyon
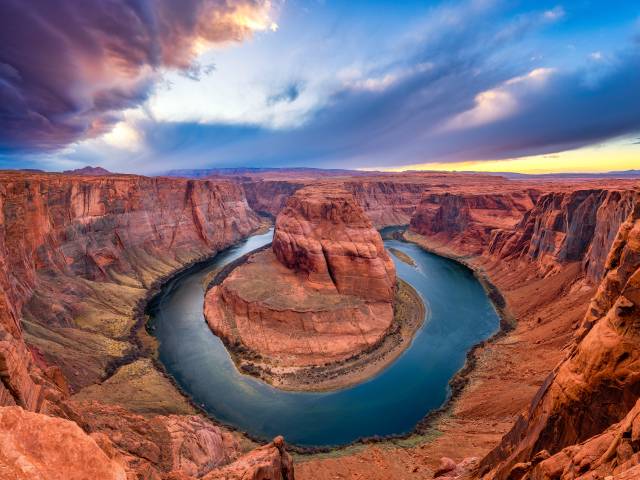
Page is a small town close to the Glen Canyon Dam and a few natural landmarks that have become very famous: Horse Shoe Bend and Antelope Canyon.


Grand Canyon
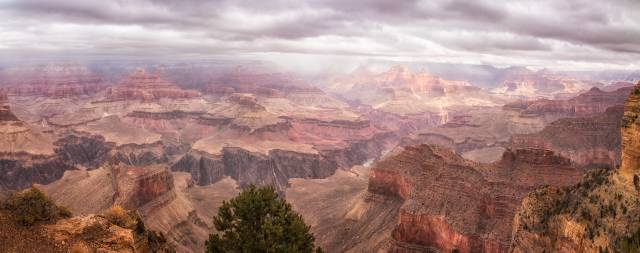
The next stop was Grand Canyon. We arrived in the evening and watched a beautiful sunset. The next morning everything was covered in clouds, rain, and snow.
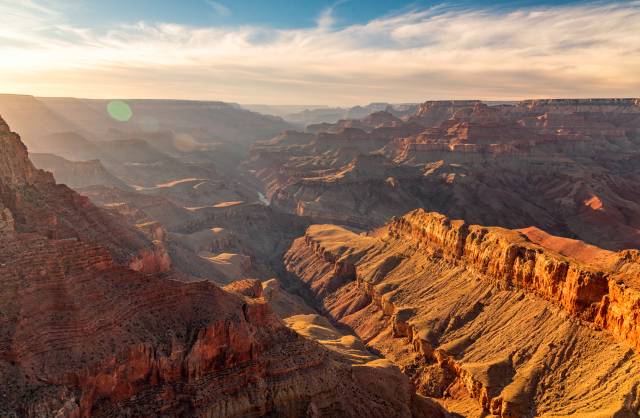


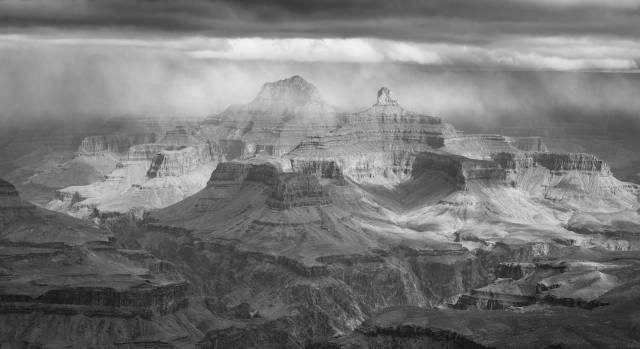
Again, we left after only one night to avoid more heavy snow with the rental car.
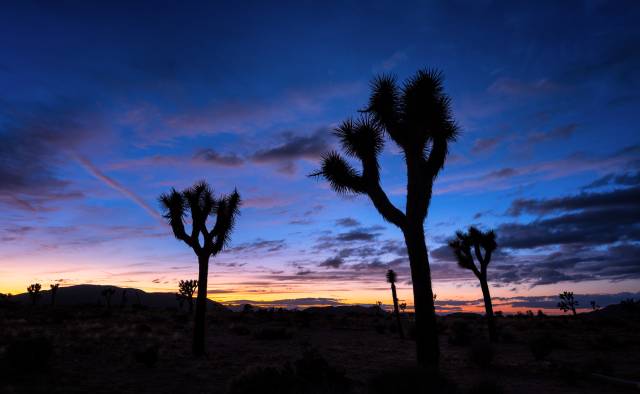
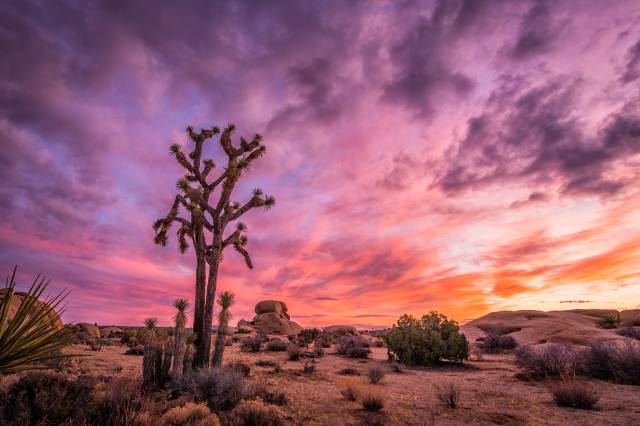
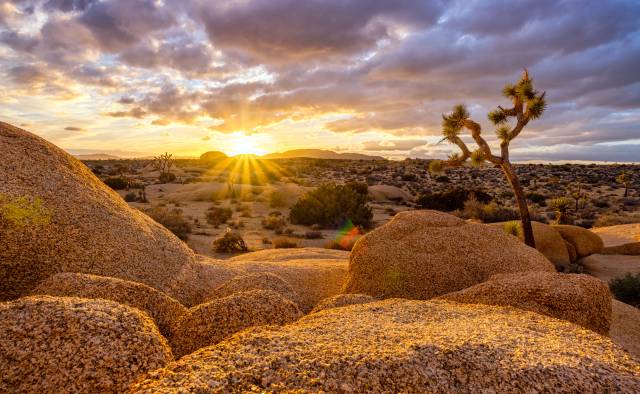
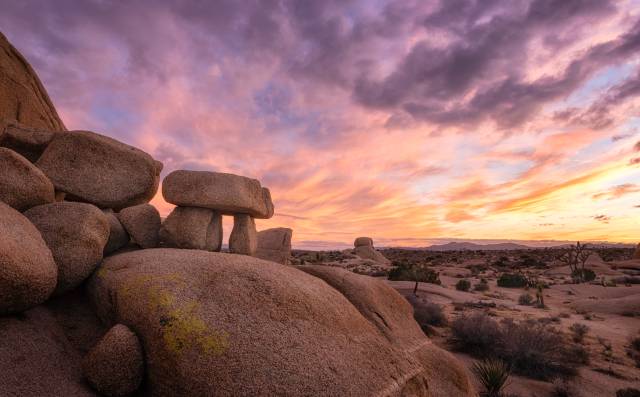
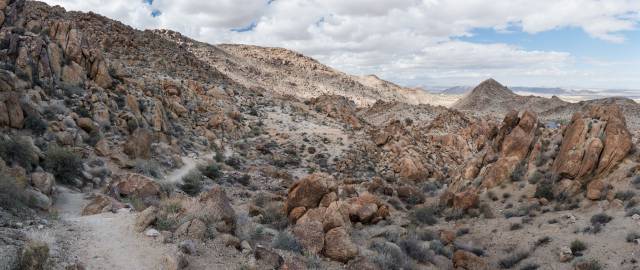
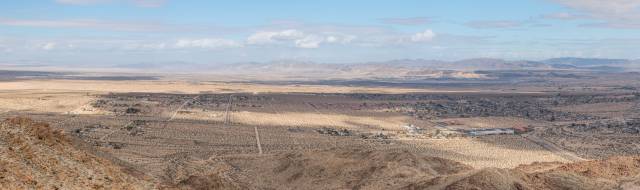
Joshua Tree National Park
The next stop on our route back towards the coastal San Diego was Joshua Tree National Park.
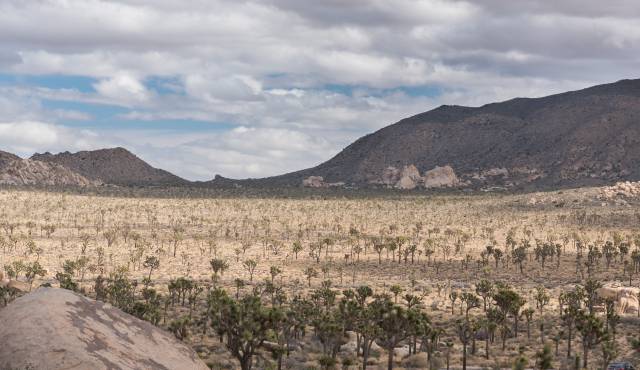


An interesting hike outside the main valley area is 49 Palms Oasis.


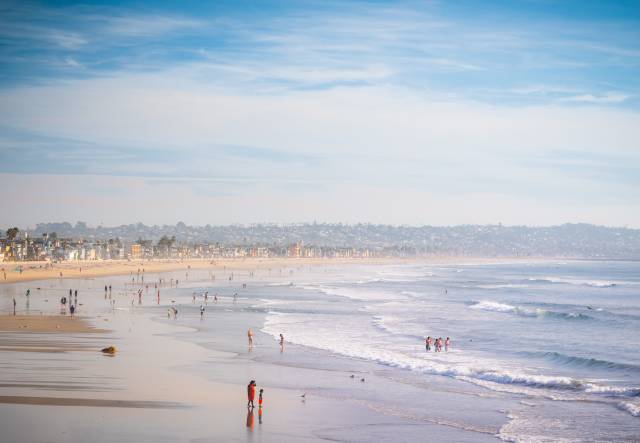
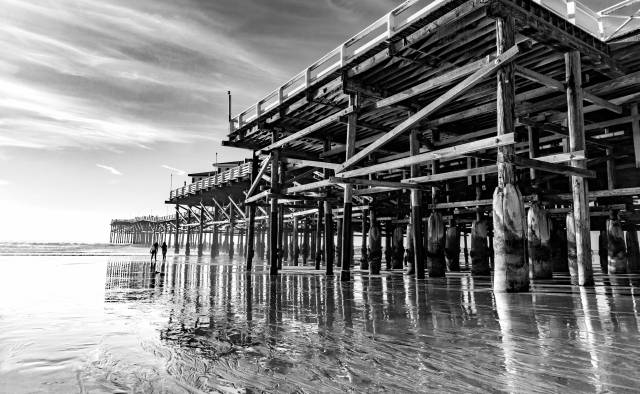
San Diego
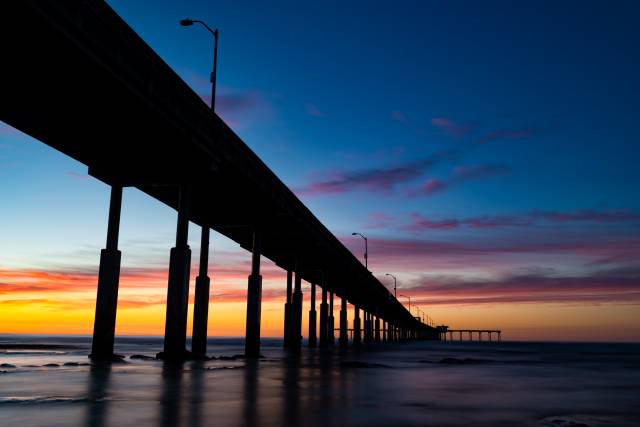
The last stop on our road trip was the city of San Diego with its endless beaches.


Technology
Hugo static site generator
As already for the previous incarnation of my portfolio, my decision was to use a static site generator such that I can avoid any dynamic parts on the server side. This prevents many security issues and also results in fast loading times. So far, I had used Jekyll for this site and Middleman for my tech blog. From a technological point of view I am more in favor of Middleman because of its greater flexibility. However, what both frameworks lack is good support for managing photos, which is one of the main aspects of a photography portfolio. Therefore, I searched for alternatives and finally selected Hugo as the basis for the new portfolio. With page resources photos and other assets can nicely be bundled with the page they belong to and Hugo’s image processing features make it really easy to crop or resize images automatically.
Theme
When starting this project I had the hope that I could speed up the process by building onto an existing theme. Therefore, I took some (longer) time to browse through the available Hugo themes. However, not many of them were suitable for the kind of site I was envisioning with a portfolio, photo stories, and a blog section. Many visually appealing themes are limited to single page designs, which doesn’t work for this structure. One of the closest candidates was Massively, which is also used by Urs Zihlmann for his portfolio. However, I didn’t like all aspects and also I didn’t want to end up with a completely similar page. Therefore, I finally decided to build something on my own, however, based on the CSS framework Bulma as the means to speed up the process.
Responsiveness and lazy-loading
Bulma is already mobile-first and all Bulma elements easily work on mobile platforms.
However, photos are the main content on this site and I also wanted them to be responsive such that for each device the photos are downloaded in a suitable resolution.
This especially avoids excessive downloads on mobile devices.
Fortunately, the web has matured enough to finally provide native HTML solutions for this problem and hence every large image on this site (apart from the gallery overview) now uses either img tags with the srcset attribute or - depending on the situation and the surrounding containers - picture elements with multiple sources.
In addition, most images are tagged with loading="lazy".
Modern browsers only download these images when they become visible through scrolling (or shortly before).
This again saves bandwidth.
Structure
So, what does the new site look like and what were my decisions regarding the layout?
Home page
My main idea with the home page (as already with the previous site) was to make my best images the most prominent feature. Therefore, they are presented using a fullscreen carousel.
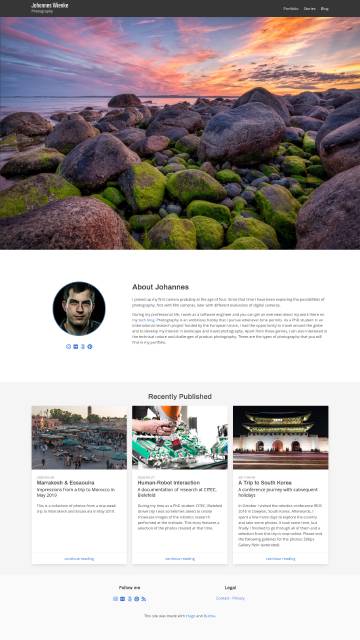
New on this page is the brief “about me” section and a “recently published” section to put some emphasis on new posts and especially photo stories.
For the carousel, I am using Flickity, which has support for responsive images and a fullscreen plugin. These were the reasons for selecting Flickity instead of the Bulma Carousel extension.
Galleries
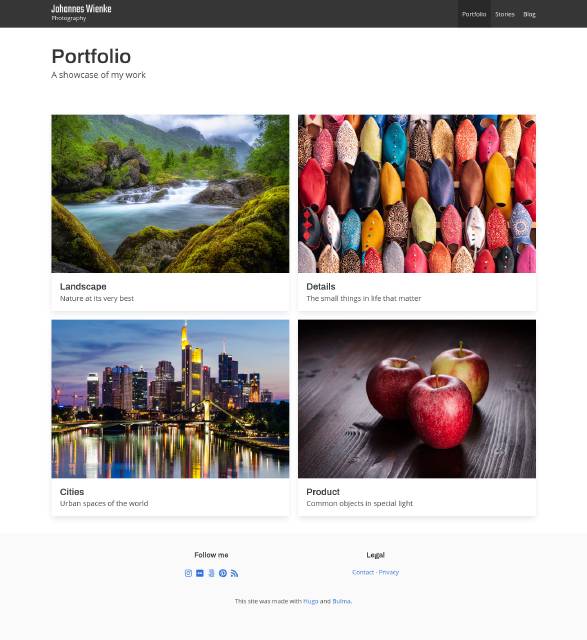
Instead of relying on a carousel/slider as on my previous site, I have this time decided to use a Justified Gallery with a fullscreen lightbox (lightGallery) for showcasing my work. This gives a better initial overview of each collection of photos while still providing the elegant fullscreen display if desired. Both selected tools support responsive images, although Justified Gallery only with JavaScript support. lightGallery is also used for a fullscreen display of images inside blog posts and photo stories, such as the one below.
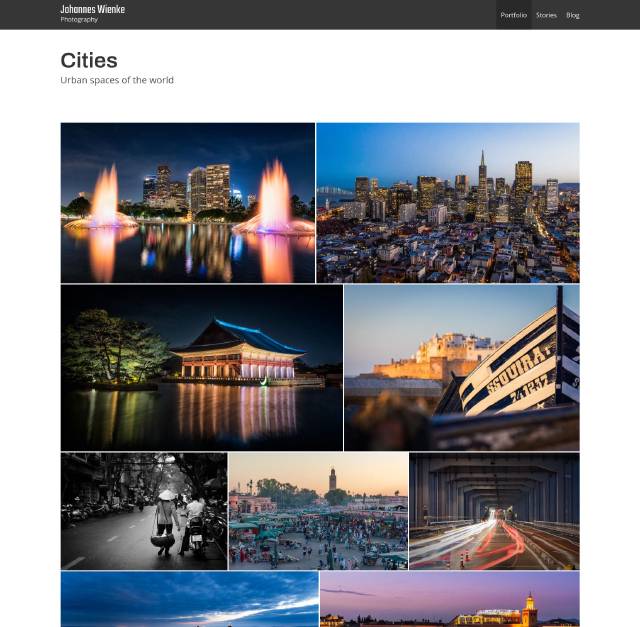
Photo stories
A new element of my site is the photo story section where I display series of related images. I have been using Exposure and Behance for such content. Exposure creates wonderfully styled stories and resonance is quite nice, however, pricing soon gets heavy. Behance, on the other hand, is free but resonance and layout possibilities are quite limited. Also, the situation with other social sharing sites is currently relatively unclear and big players are losing popularity. Therefore, I decided to create my own space for such photo stories and series with a style comparable to Exposure. This is the result:

Stories use text blocks, hero images in full width and justified galleries as the main presentation formats. All images can also be viewed in fullscreen using a lightbox. The same elements are also available to normal blog posts.
I hope that this gives a good platform for my images and serves as reasonable basis for the next few years.
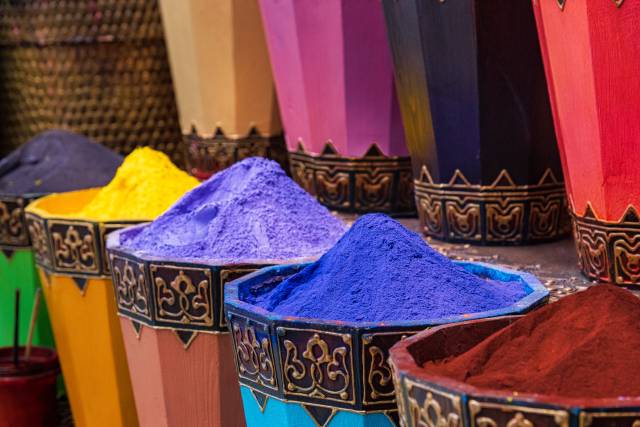
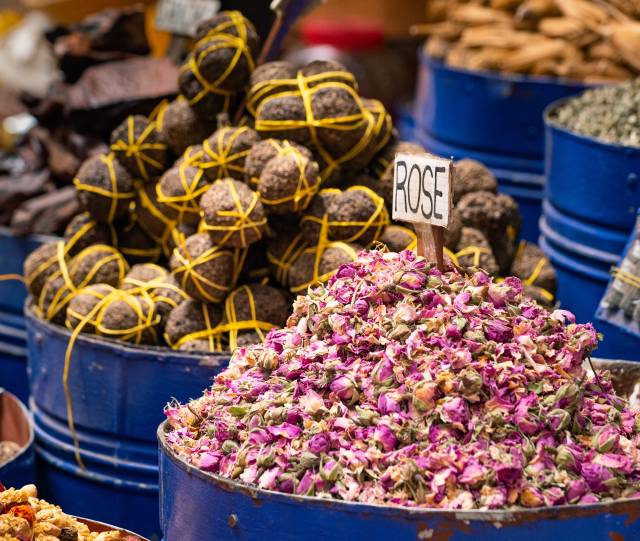
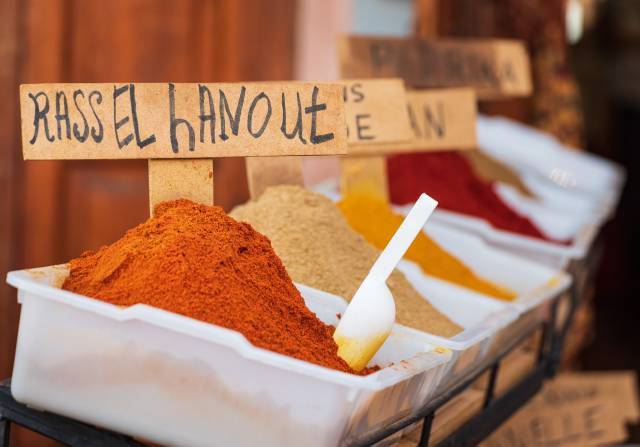
]]>The Souks of Marrakesh
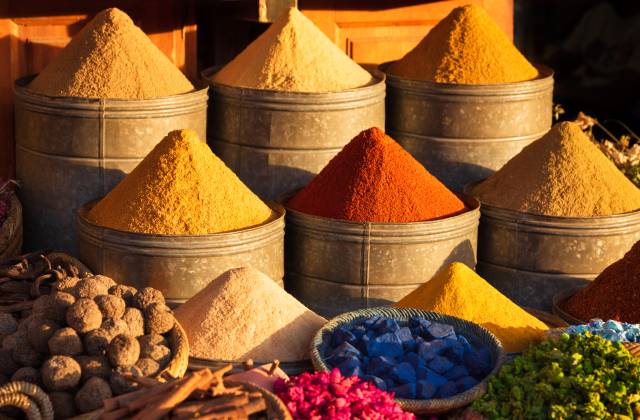
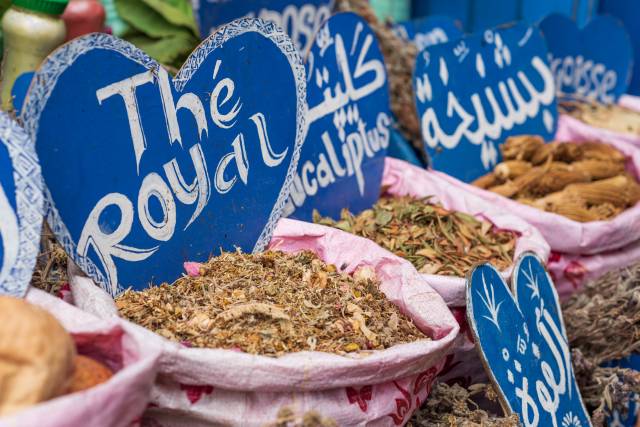
A common sight are the artfully presented spices, herbs, nuts or color pigments. Sometimes, you can spot some fake ones though.


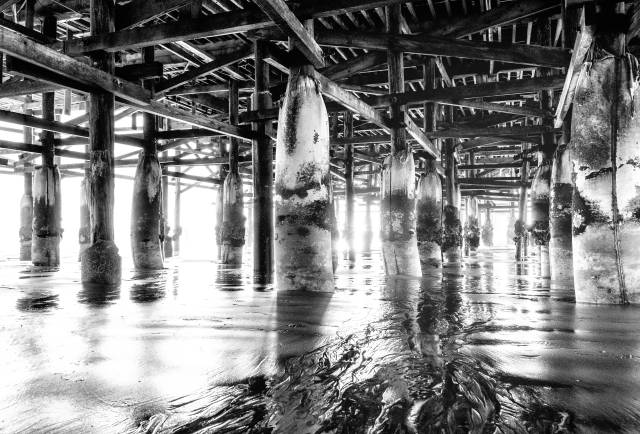
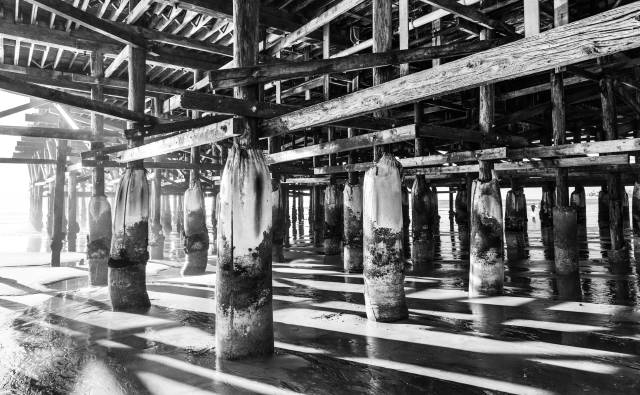
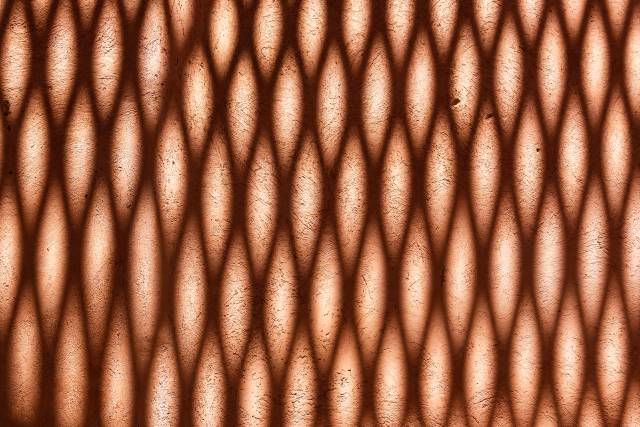
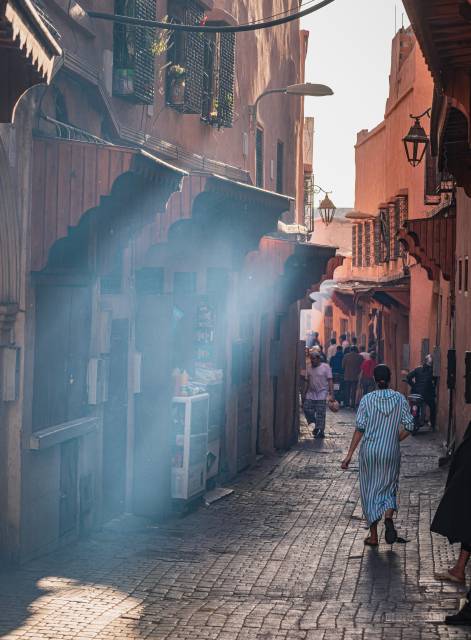
Shadow Patterns
Most of the narrow market streets are covered by a wooden construction to act as a sun shade. This results in the very typical shadow patterns found in those streets throughout daytime.
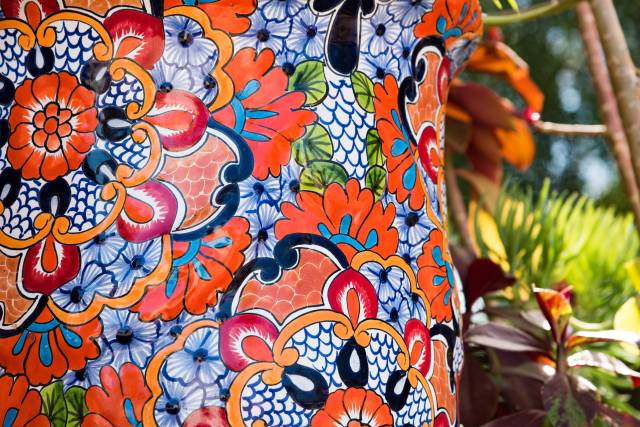
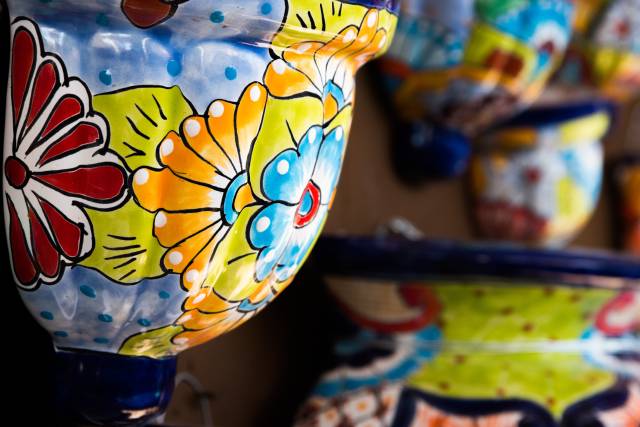
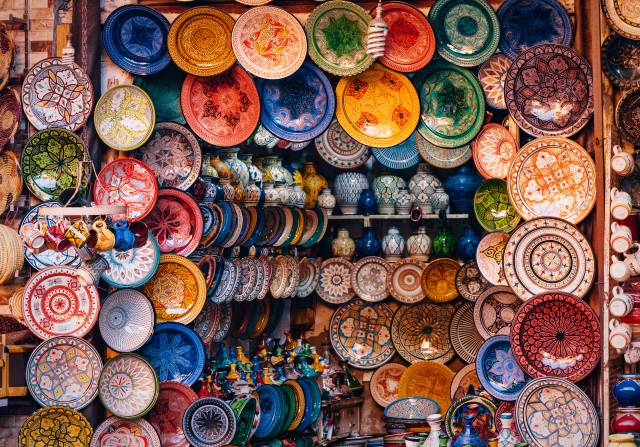
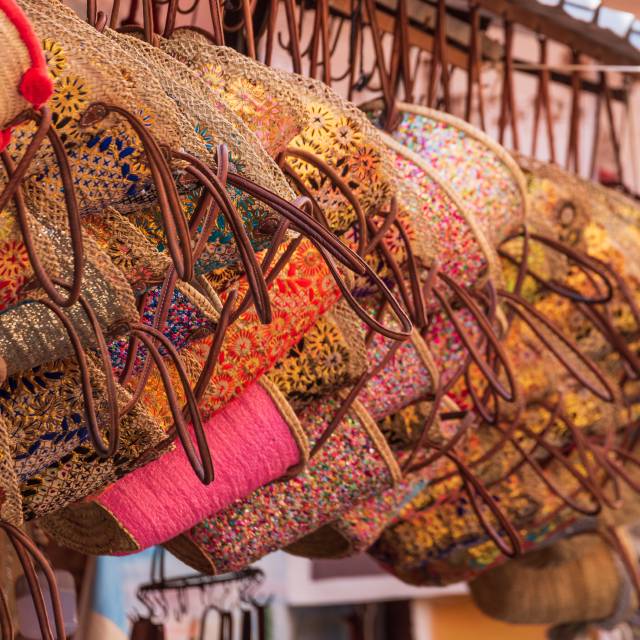
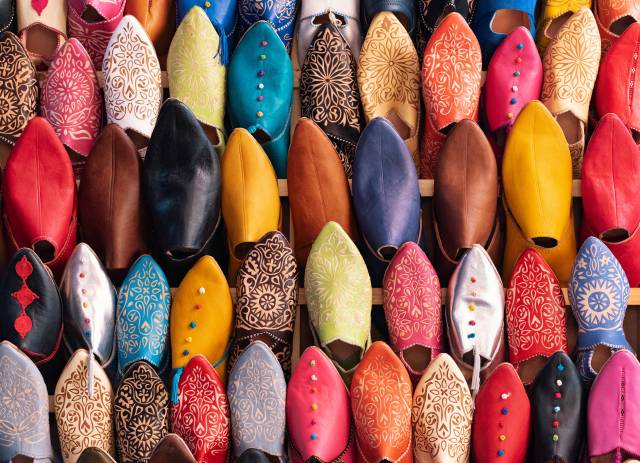
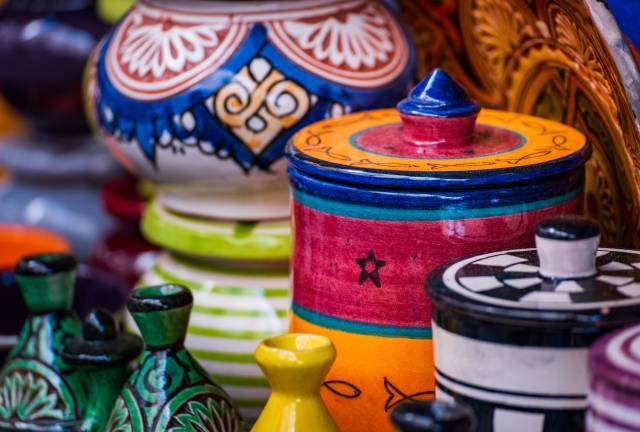
Pottery, Clothing, and Other Goods
Pottery, clothing and other accessories can be found as well.


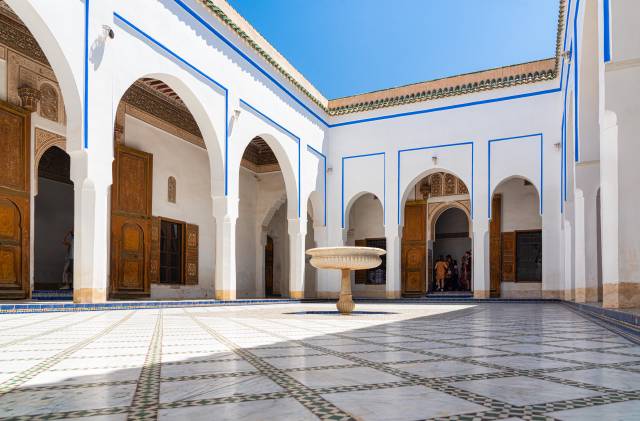
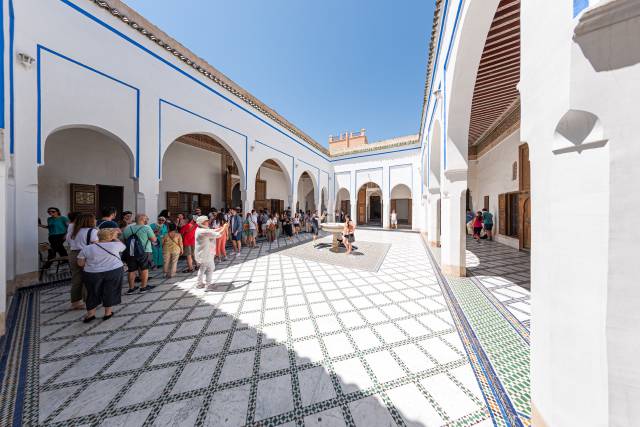
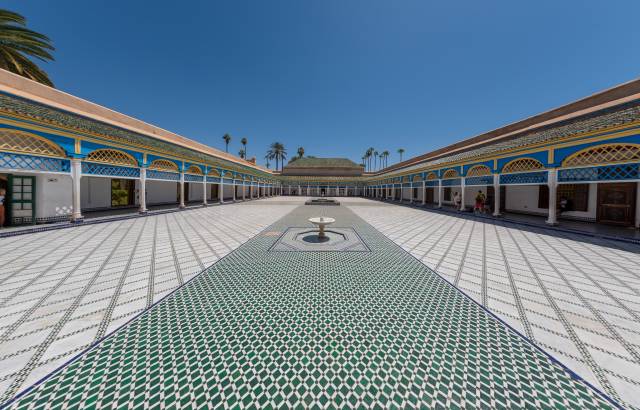
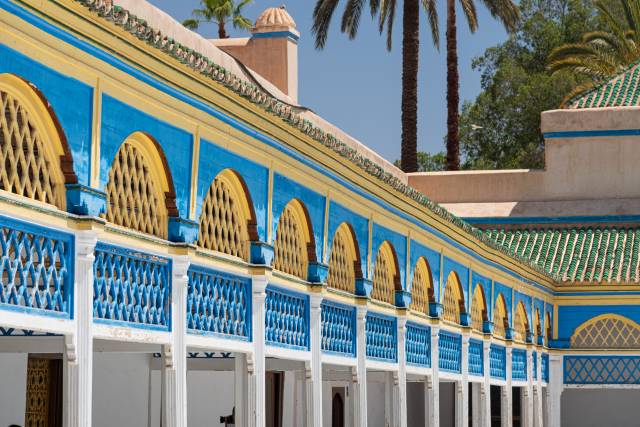
Bahia Palace
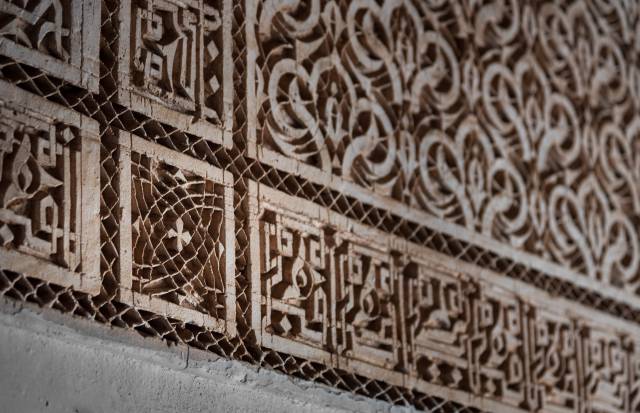
Another famous attraction of Marrakesh is Bahia Palace, a collection of impressive yards and buildings from the end of the 19th century. During opening times, this palace is constantly packed with tourists. The photo below is a composite from 10 shots over 20 minutes and still I wasn’t able to get rid of all tourists in all places.
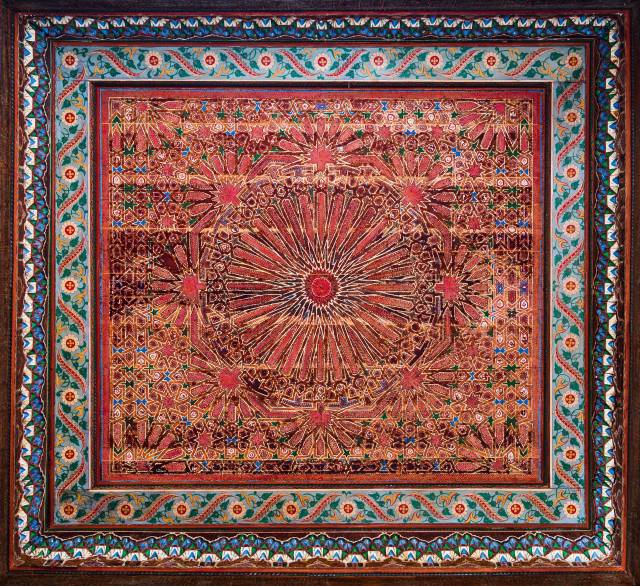
A wooden roof in Bahia Palace.


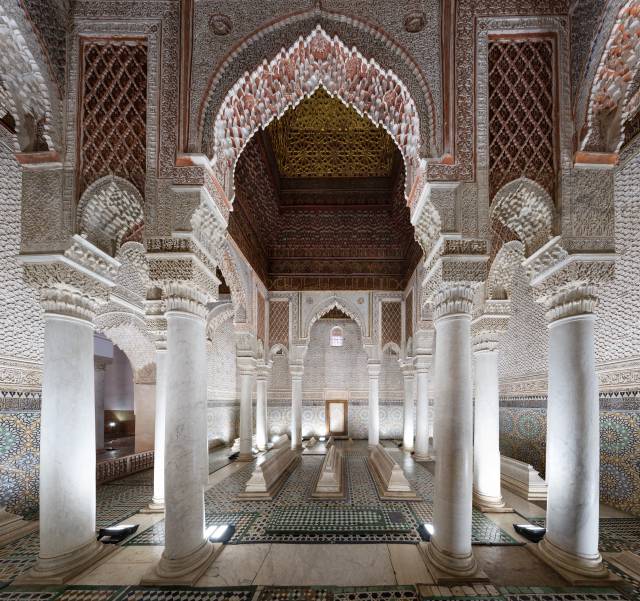
Saadian Tombs
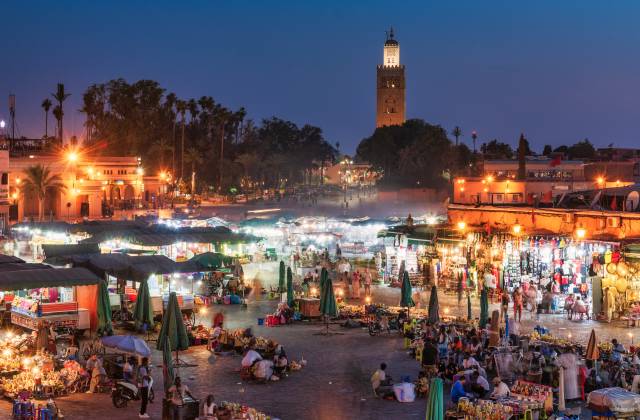
Jemaa el-Fnaa
Starting in the evening hours, the main square of the Medina in Marrakesh fills up with tourists and various opportunities for them to spend money. Outdoor restaurants fill the place with smoke, orange juice sellers try to grab your attention, and snake charmers are trying to earn some money.
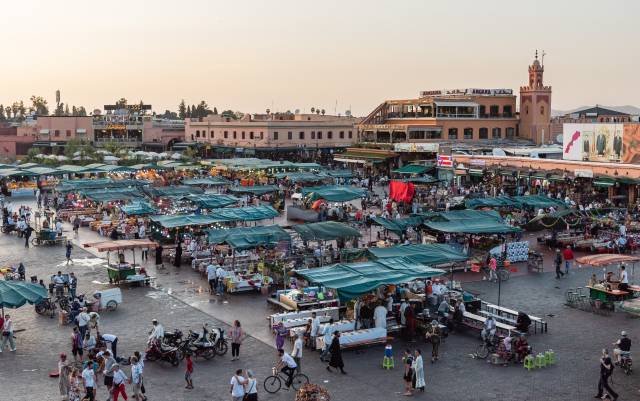
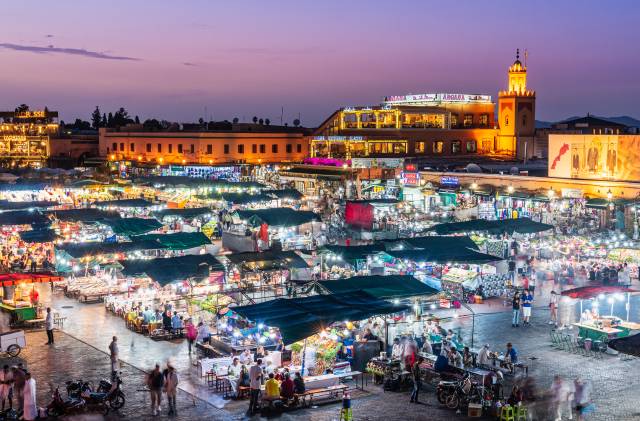
Before sunset, people assemble in one of the roof top restaurants along the borders of the square to get a good view on the scene. Be early enough to get a good table. Below are some views on the square from Cafe de France and Cafe Glacier.


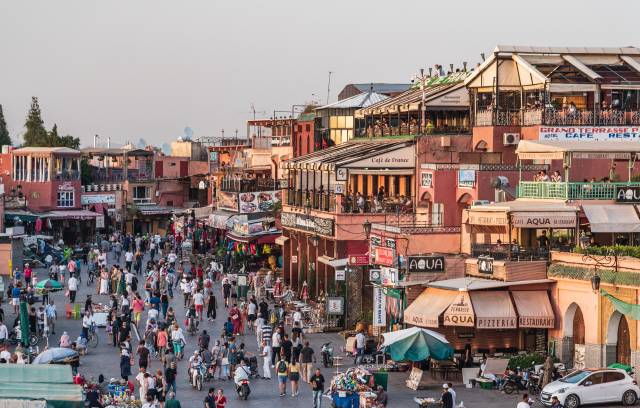
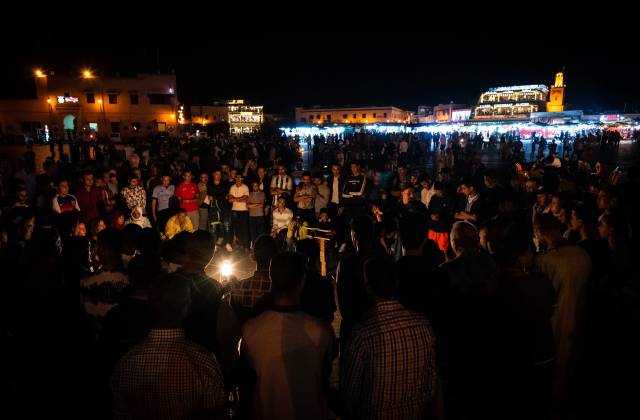
Night-Time Entertainment on Jemaa el-Fnaa
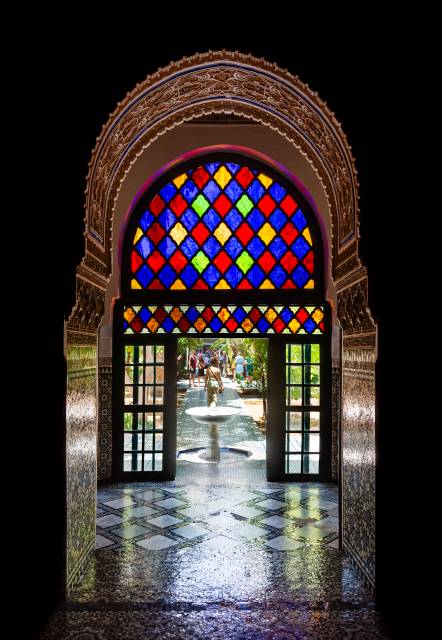
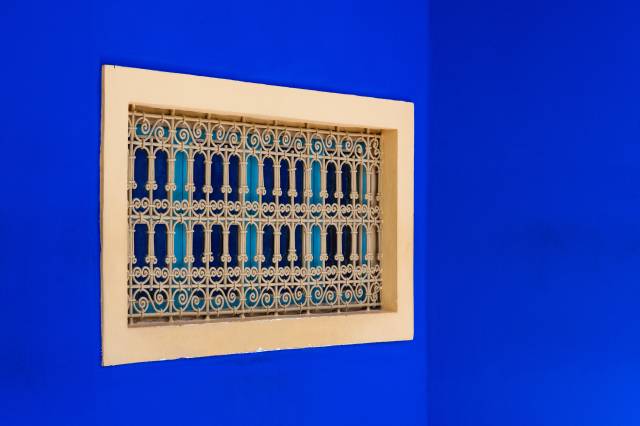
Jardin Majorelle
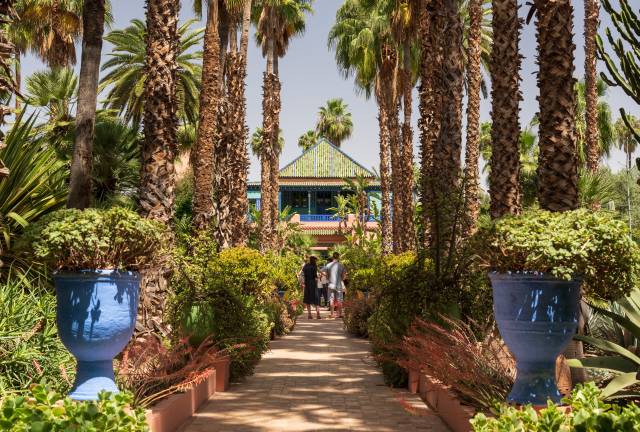
The most famous attraction in Marrakesh, located outside of the Medina. A nice garden, but not extremely impressive to my mind. A good opportunity for photos is the blue building inside the garden, though.
Getting a View from the Secret Gardens

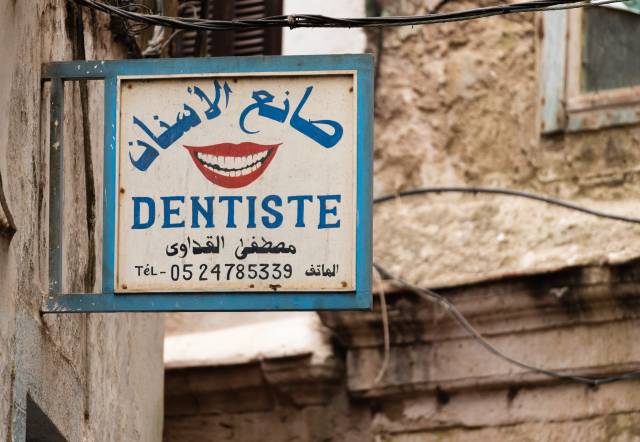
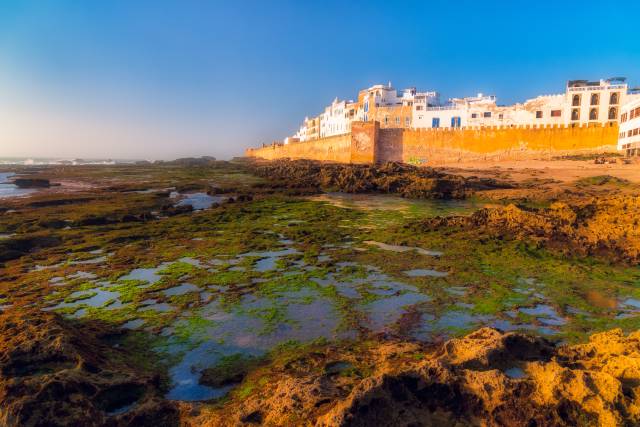
Essaouira
In contrast to the big and hot Marrakesh, Essaouira is a little town at the coast with a relaxing atmosphere and comfortable temperatures.

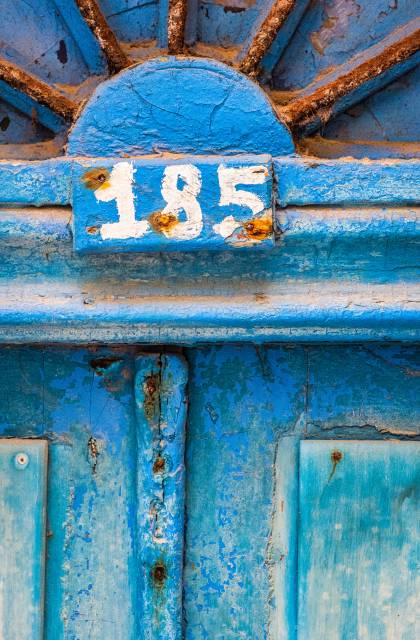
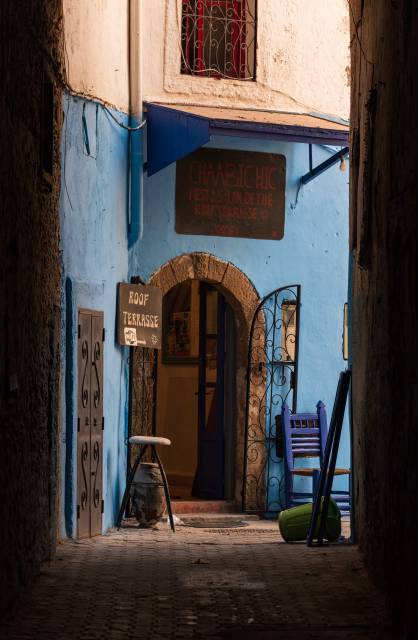
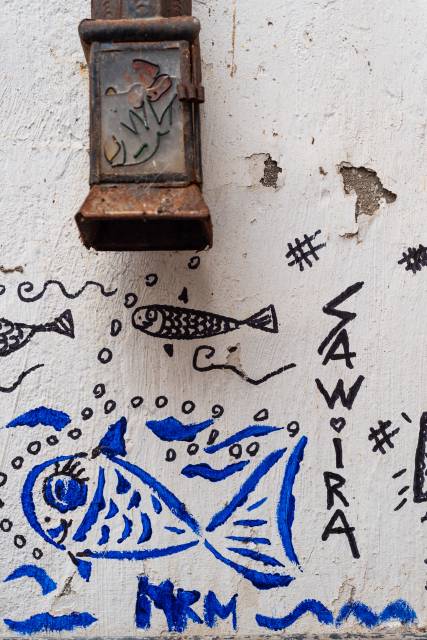
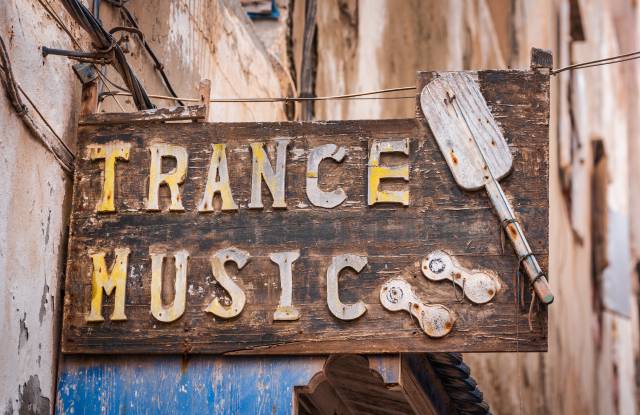
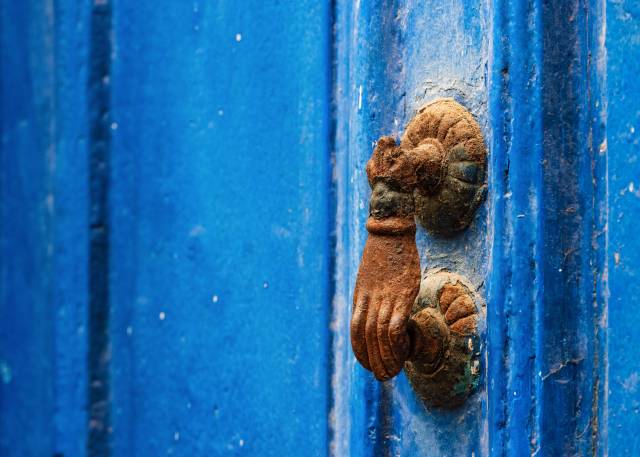
The Streets of Essaouira


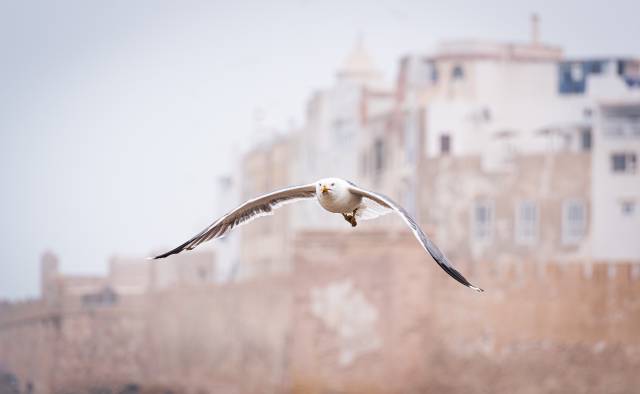
City of Sea Gulls
Especially at the harbor, Essaouira is without doubt a city full of sea gulls.
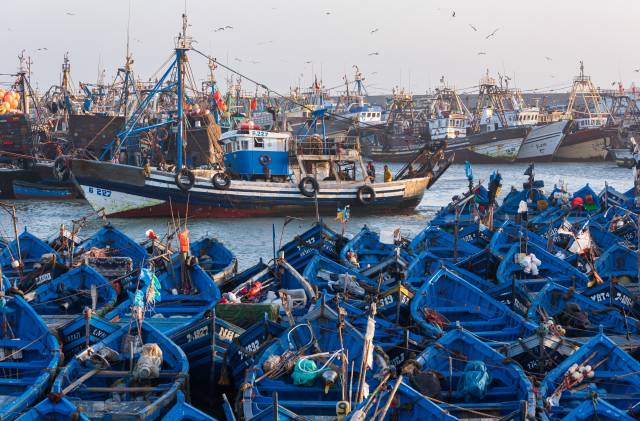
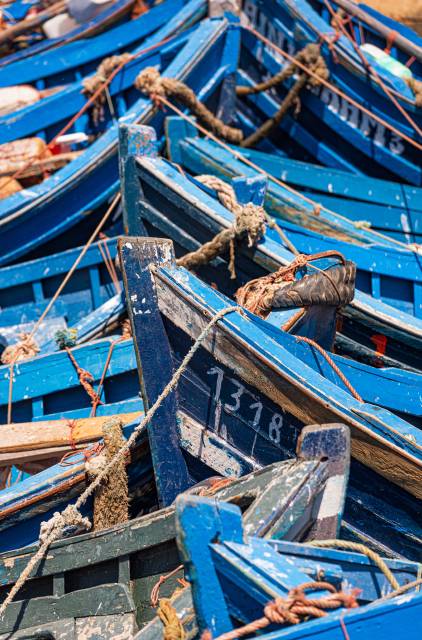
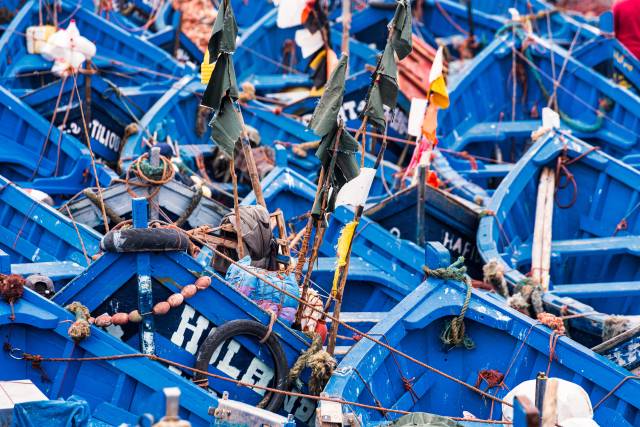
The Harbor
The most crowded and busy area is definitely the harbor with many small blue fishing boats and fisherman trying to sell the fresh fish. Without cooling, the smell can sometimes be overwhelming here.


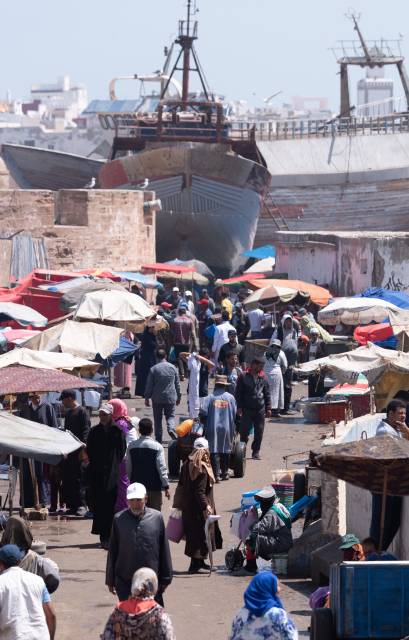
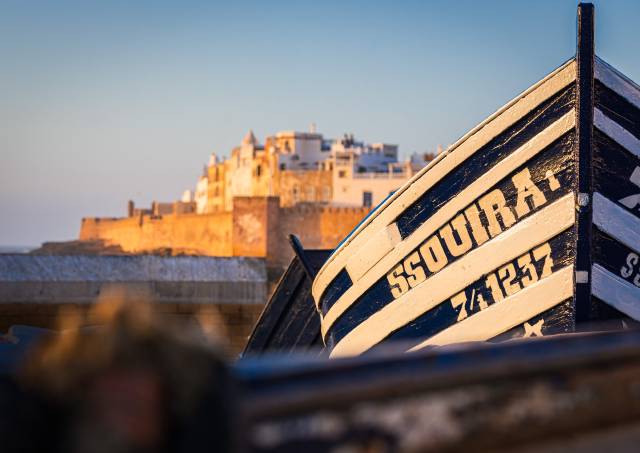
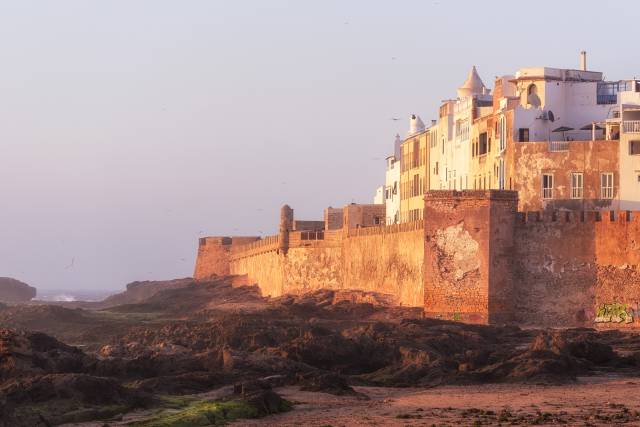
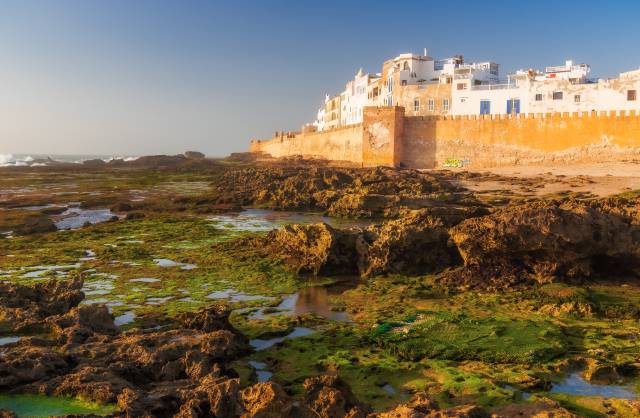
The Skyline
The most iconic part of Essaouira is definitely its skyline with the Medina surrounded by city walls raising high above the ocean.


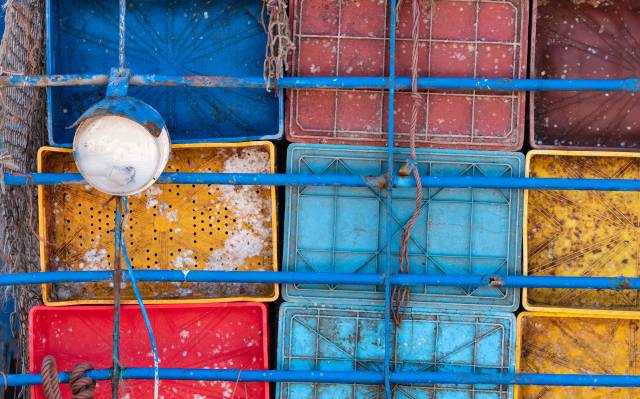
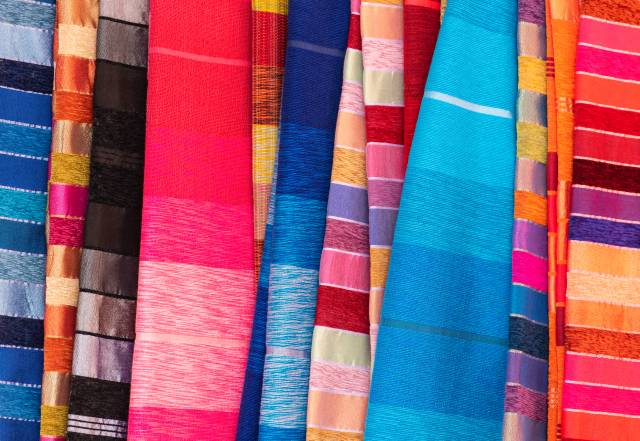
The Souks of Essaouira
Of course, also Essaouira has markets and shopping streets inside the Medina. In contrast to Marrakesh, people are more relaxed here and you have a lot more time to take a look at their goods before they start talking to you.


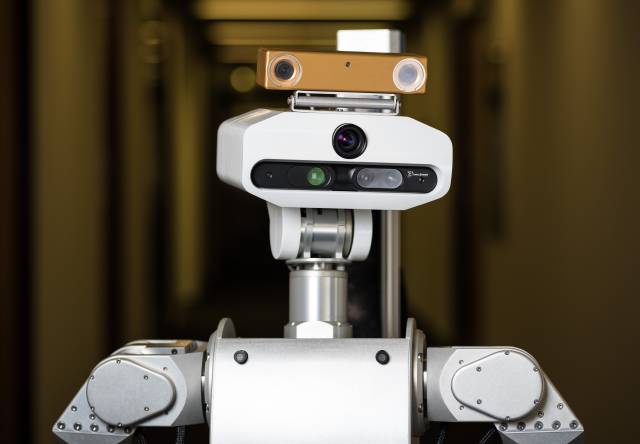
CITEC was primarily known for its research on human-robot interaction. One of the prototypical robotics involved there is the colleague below.
My group was, however, primarily researching human-robot collaboration in industrial settings. For this purpose, an industrial transfer laboratory was operated with different industrial settings replicated there.


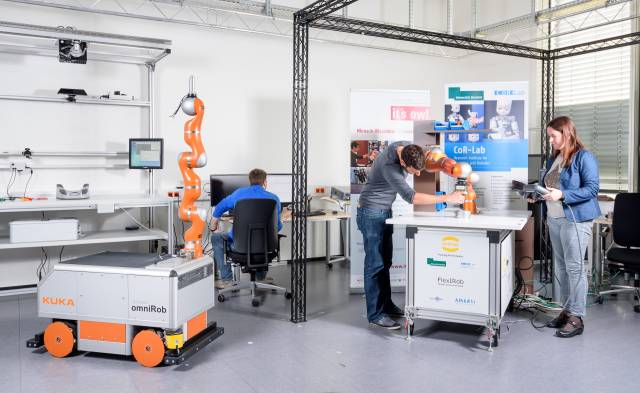
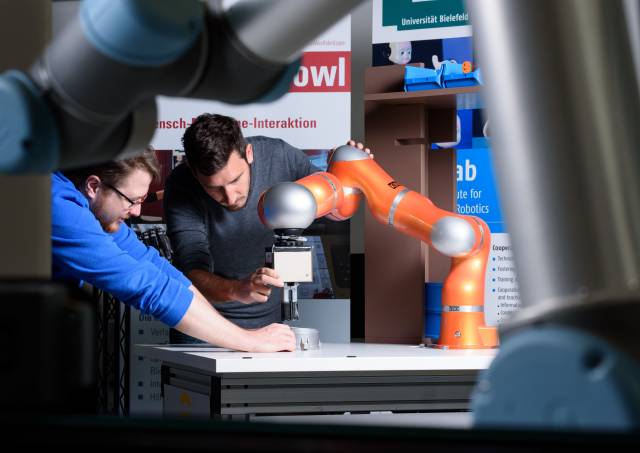
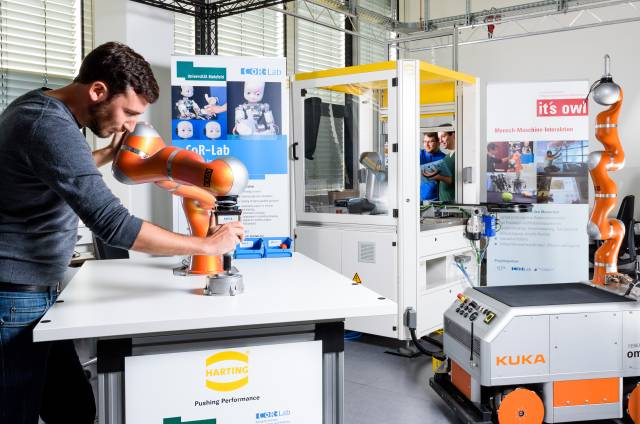
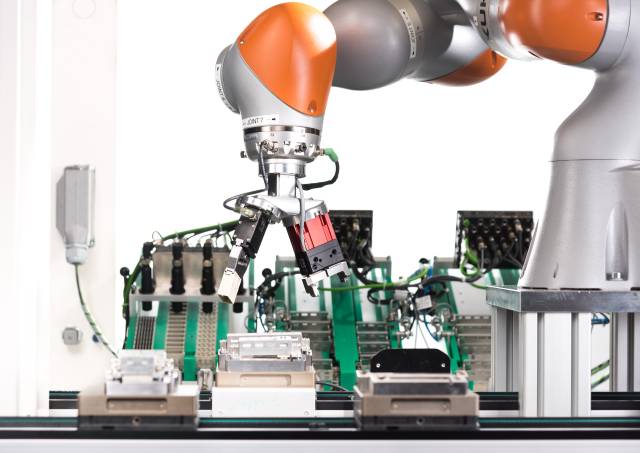
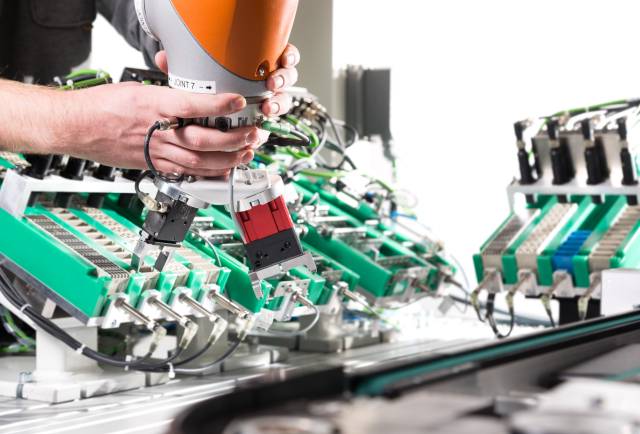
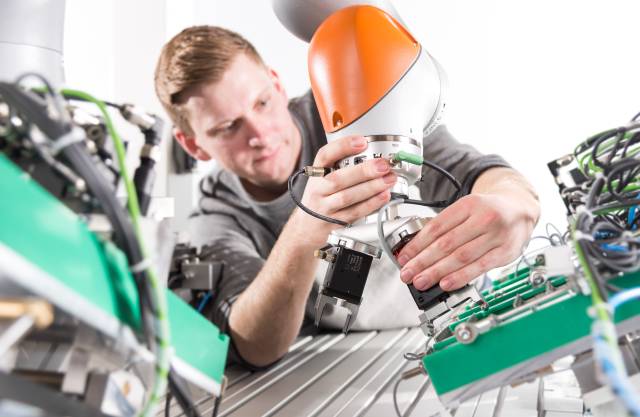
Inside the transfer lab, one photo series I took documents research on reconfiguring a robotic arm inside a modular production cell using physical human-robot interaction.


Please visit the following galleries for the photos:
]]>Especially for the Vietnam trip there is a Flickr Album with a larger collection of images documenting three weeks in this country.
]]>These plans have now become reality and the jigsaw puzzle is available at Teddy Toys in Bielefeld.
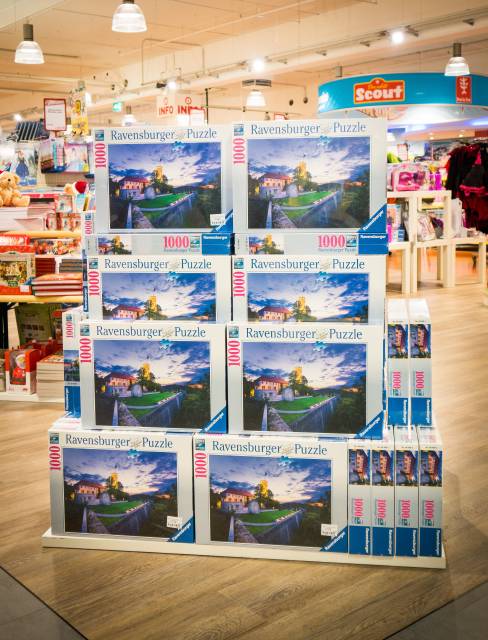
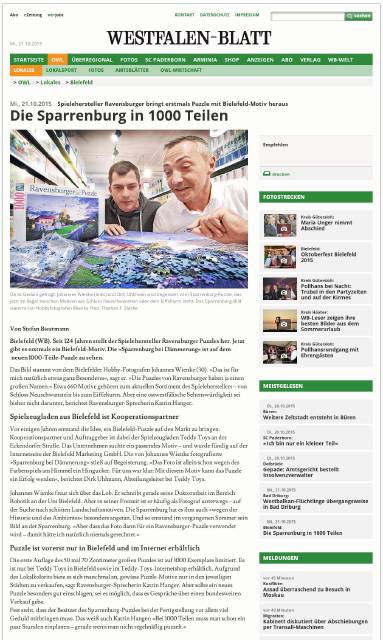
Westfalen-Blatt, a local newspaper, reported about the first Ravensburger jigsaw of Bielefeld on Wednesday:
There is only a limited amount of these jigsaws available. So go ahead and buy them. ;)
]]>
For the layout, I emphasized the focus on the photos by making them the main content of the site and displaying them in full size without any user action required. This way, the photos hopefully get a lot more attentions and just look nicer.
Technically, the site now has a much improved responsive design which should make mobile viewing much better and faster. Images are now also delivered in the appropriate size for the viewing device, so that mobile loading times and bandwidth are reduced. The responsive image solution is completely realized using CSS as explained in this article.
From a backend perspective I moved away from Wordpress and dynamically generated content to a completely static site, by using the Jekyll static site generator. No more Wordpress security nightmares…
]]>
After this experience I wanted to examine this more closely and created a simple test setup to compare the colors of the four different speedlights I own. To do this, I placed a greycard in front of the camera and fired each flash onto this greycard with different output levels dialed in. For each output level I took 3 subsequent shots so that I could also get an insight on the consistency between shots. First things first: For each output level all tested speedlights are very consistent. So I will only focus on the remaining aspects now. This is an overview of the collected photos:
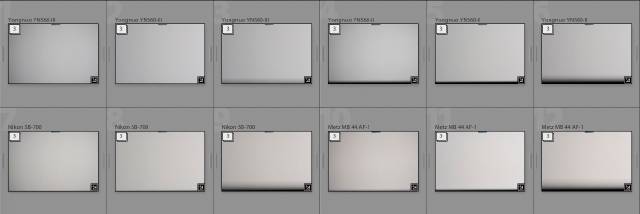
As visible from the photo grid, the two Yongnuo speedlights are quite consistent with respect to color temperature. However, the Nikon and Metz ones are a bit warmer. Moreover, it looks a bit as if their color varies with output levels. This somehow contradicts what David Hobby said…
To be at least a bit more precise about the differences in color, I also include the histograms for the first photo of each speedlight. The measurement point in all cases (for the percent values Lightroom displays) was chosen in the center of the image.

At least now I know which speedlights to combine in case of a comparable product shot.
]]>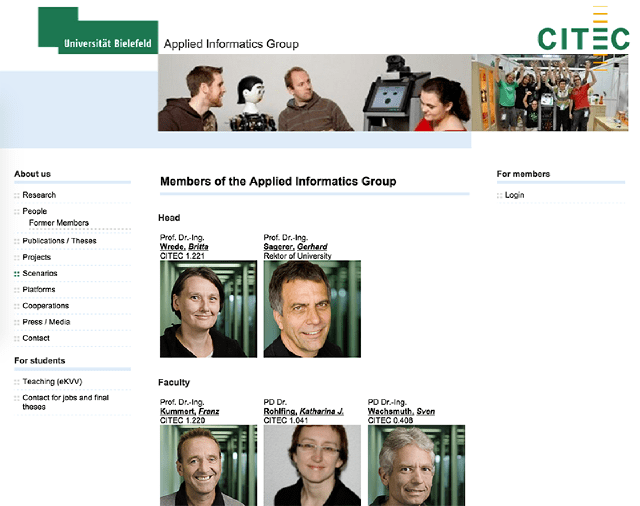
The general idea was to have kind of a classic corporate headshot that is easily reproducible as members come and go. Moreover, I wanted to incorporate a few aspects of our new research building. The resulting setup was quite easy in the end. One of the long hallways, softbox on one side, reflector on the other and the flash gelled to increase the green color of the fluorescent lights in that hallway, as green is the signature color of the university. I had to use the fluorescents as I could not light the whole hallway artificially without annoying all colleagues working there. So I had to balance the flash power with the available light, which resulted in some green color casts on the heads. I fixed these in post.
]]>The “suboptimal” way
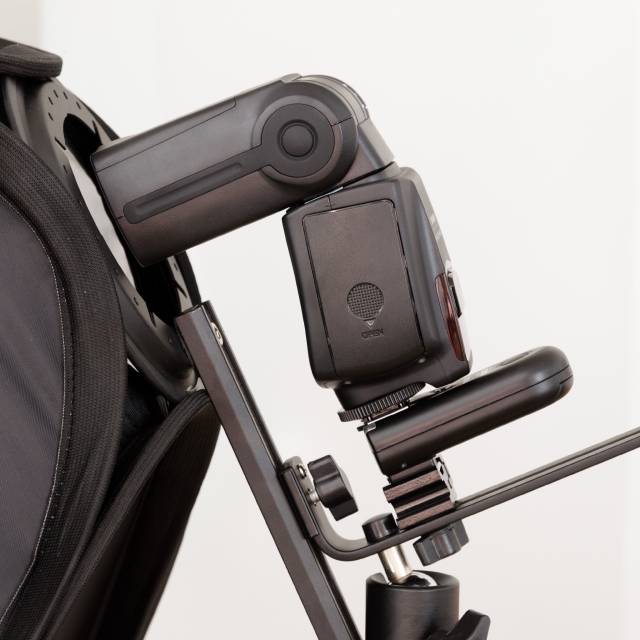
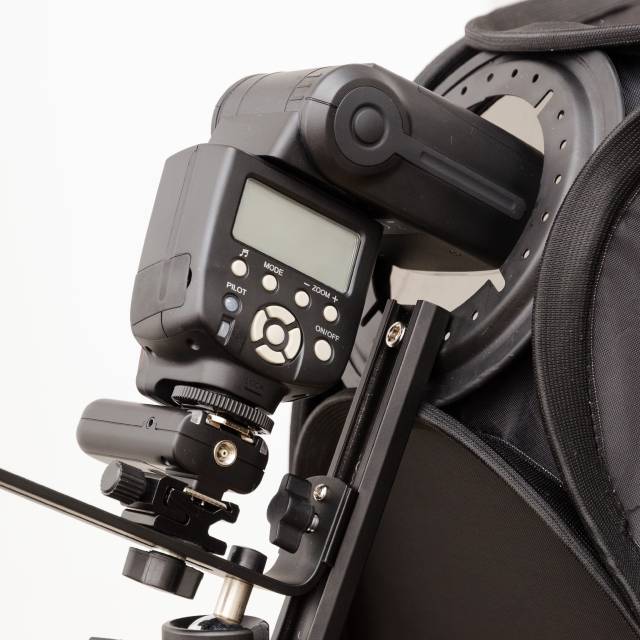
This solution works as soon as you have a flash where the head can be turned around by 180 degrees. In that position the flash trigger extends to the back of the softbox mount and doesn’t collide anymore. However, flash controls are basically blocked and often the head is too short to actually enter the opening of the softbox, wasting a bit of light. Even for the monster-sized Yongnuo YN560-II…
The “right” way
Many of the flash softboxes, especially the cheaper (Chinese?) ones from Walimex, Delamax, Alzo or whatever names exist, use a mounting system where the flash bracket is attached to the ring using a single screw. Hence, in this case the ring can be turned to point slightly off-axis from the vertical mounting bar:
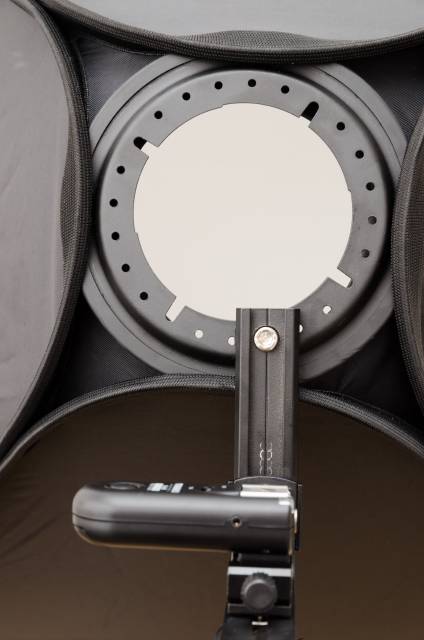
This allows us to mount the flash perpendicular to the axis of the softbox with the flash head turned around to one side so that the controls are easily accessible:
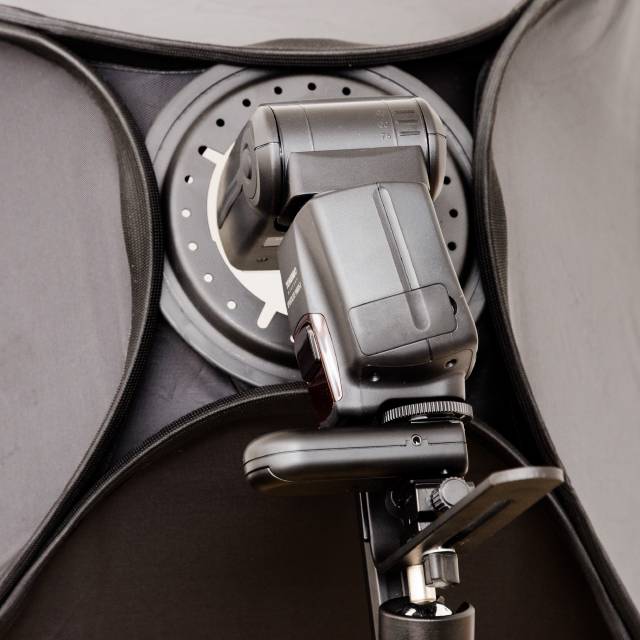
Without twisting the ring, this usually doesn’t work for modern flashes as the flash head most often doesn’t rotate directly on the axis of the hot shoe and hence the flash head wouldn’t enter the ring correctly.
]]>Some of the aforementioned issues can be addressed by using a tripod for shooting macro photos. But even with a tripod, touching the camera for fiddling around with the menus easily results in slight movements and hence out of focus photos.
This is the time where tethered shooting can greatly improve the situation. The idea behind tethered shooting is that you connect your camera to an external device like a laptop, tablet or smartphone and then use this device for some of the camera’s functionality, e.g. pressing the shutter and reviewing the resulting photo on a much bigger screen. Usually, setting up the camera, laptop and the wired connection and then being limited by the cable length is not an option with the resulting setup time and inflexibility but as taking macro photos is usually a slow business at the same place, this is not a real issue here.
During the last years many options for tethered shooting have emerged but the available functionality differs considerably and some solutions are more useful for macro photography than others. To my mind the following features are required for providing a real help with macro photography:
- Live view: Live view of the camera image on the tethering device for composing and defining the focus.
- LV 100% zoom: 100% zoom in live view for accurate focusing.
- Zoom position: Free position of the zoomed view in the whole live view image. Usually the subject is not in the center of the image…
- Camera control: Control of common camera parameters like aperture and shutter speed to avoid touching the cameras as much as possible.
- Focus: Setting the focus automatically and manually inside the tethering software.
- Review: Instant review of captured images with full size to review focus and DOF.
Considering these requirements I have evaluated a few available tools for my personal use. In the following paragraphs I will share my experience with these tools. As I currently own a Macbook and an Android tablet as portable tethering devices the selection of tools is limited to these platforms.
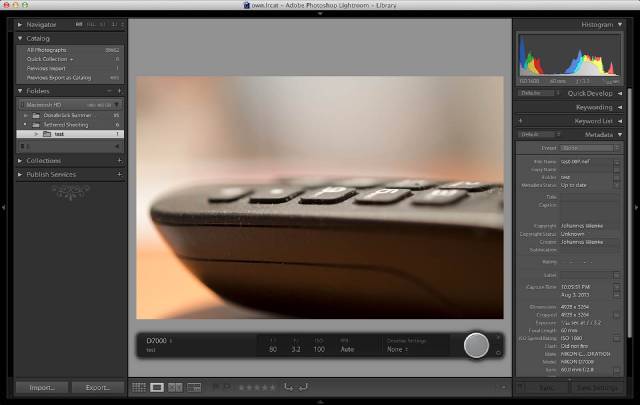
Adobe Lightroom
Link - Commercial
Lightroom provides tethering support since some time and has support for a wide variety of cameras. Many photographers would probably prefer using Lightroom as a “one size fits all” solutions so that no additional software needs to be used. Unfortunately, only a minority of the requirements for macro photography are fulfilled.
- Live view: no
- LV 100% zoom: no
- Zoom positions: no
- Camera control: minimally, only shutter
- Focus: no
- Review: yes
Sofortbild
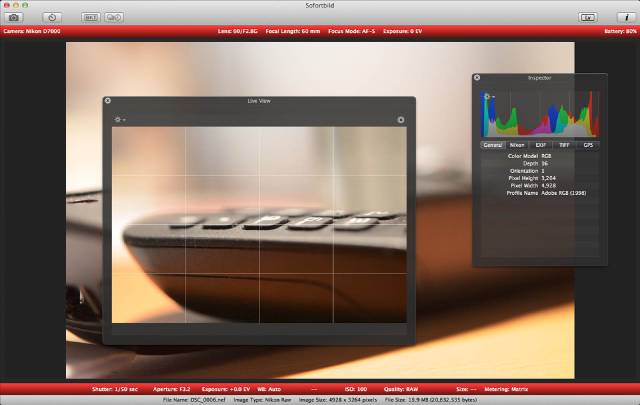
Link - Free
A Mac application for tethered shooting. It basically provides the same operational mode to tethered shooting as Lightroom does but for free.
- Live view: yes, but basically unusable, i.e. no control of the camera like auto focus works when in live view.
- LV 100% zoom: yes
- Zoom positions: no
- Camera control: no
- Focus: no
- Review: yes
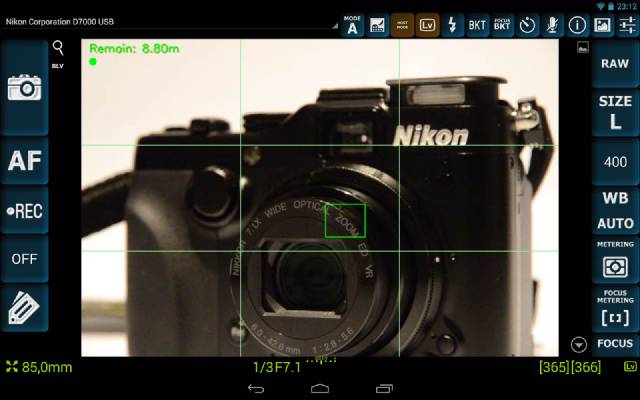
Helicon Remote
Link - Commercial with limited free version
An Android application. Helicon seems to be one of the state of the art providers of technology for focus stacking, a kind of special use case for macro photography. Helicon Remote is the Android application to control the capturing of images for focus stacking they provide. Naturally it also meets some of the requirements for usual macro photography.
- Live view: yes
- LV 100% zoom: yes
- Zoom positions: yes
- Camera control: mostly. Camera mode needs to be selected on the camera, basic settings like aperture and ISO can then be adjusted inside the app.
- Focus: yes
- Review: yes
Notes:
- Helicon remote is not entirely free. For shooting in RAW format a license needs to be purchased.
- When the camera is in manual mode I experienced several bugs when changing settings like aperture on the tablet, which required a restart of the app.
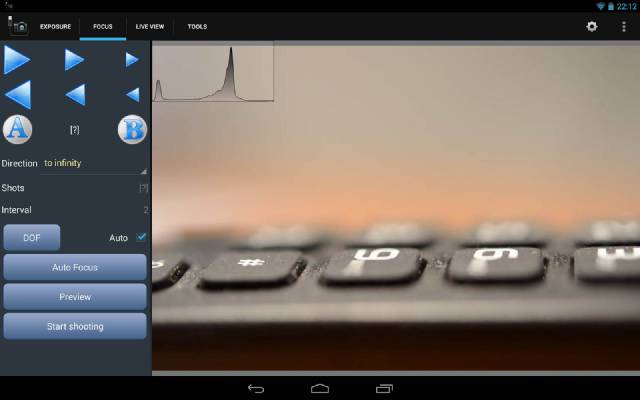
DslrDashboard
Link - Free (GPLv3)
An open source Android application for tethered shooting with a lot of functionality. Unfortunately, with the amount of available features the interface is quite cluttered and its sometimes not easy to understand how to achieve what you need. Moreover, I have observed some crashes in the past but not with the most recent version.
- Live view: yes
- LV 100% zoom: yes
- Zoom positions: yes
- Camera control: yes
- Focus: yes
- Review: yes, sometimes automatic launch is buggy but can be manually triggered after the shot
Notes:
- The review feature only works reliably if JPEG files are used (in conjunction with RAW files). This is not a problem for me as I can easily shoot both RAW and JPEG in parallel.
- DslrDashboard also supports shooting focus stacks.
Verdict
Lightroom and Sofortbild implement a tethered shooting mode that basically replaces the screen of the camera for review with the computer screen in addition to directly downloading the photos to the computer. Besides having a bigger screen for reviewing purposes this does not help very much with the macro shooting process. Much better suited are Helicon Remote and DslrDashboard. Both satisfy nearly all requirements with their fine grained camera control and live view capabilities (and additionally, a table is more portable than a laptop). Personally, I decided to use DslrDashboard. It is entirely free and doesn’t require a license > 40$ for shooting in RAW format as Helicon Remote does. Also, it offers more controls and features than Helicon Remote already does with the price of a more cluttered user interface. Finally, I had less annoying bugs and crashed in the most recent version of DslrDashboard than with Helicon Remote.
In one of the next posts I will try to come up with a short tutorial how to use DslrDashboard for macro purposes and how to understand the user interface. ;)
]]>
(Lighting diagrams and pull back shots for the two product shots can be found in the flickr comments for the two photos)
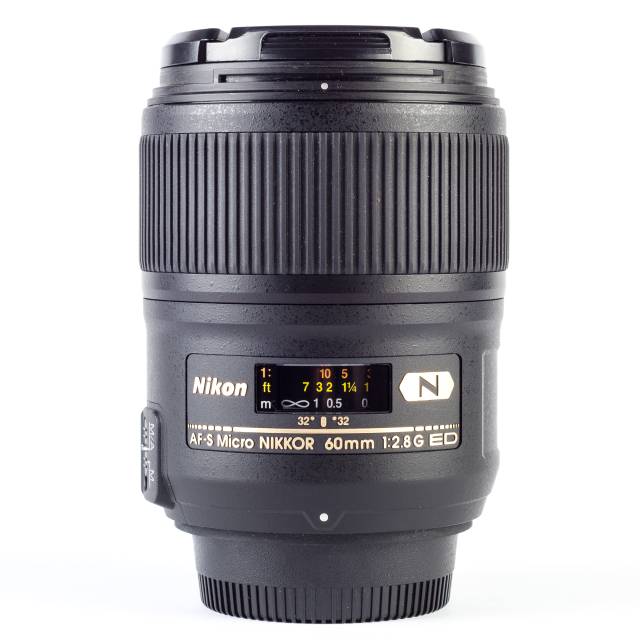
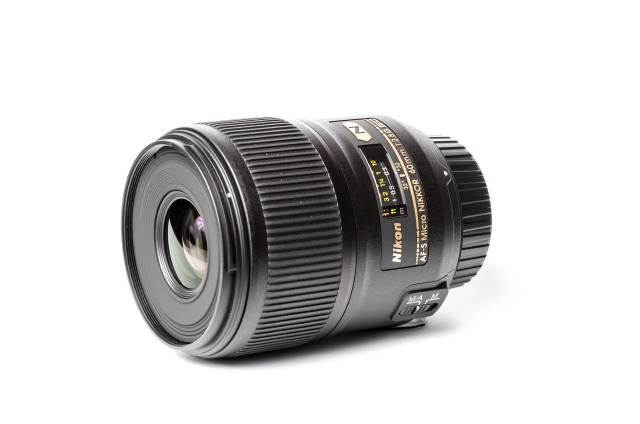
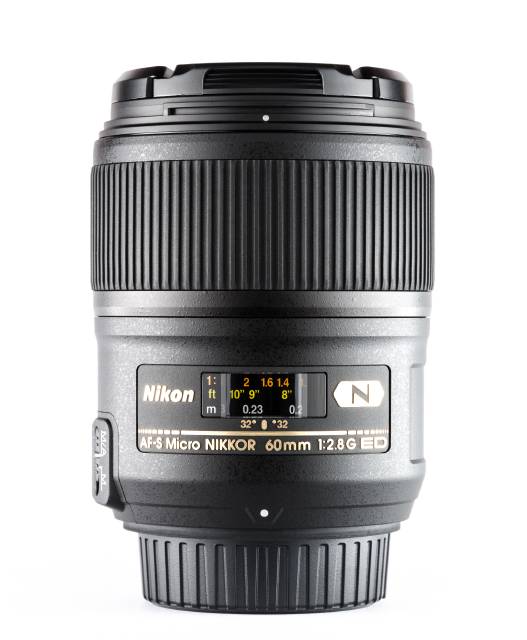
Here are some initial experiences with the lens.
First of all, I am quite happy with it so far. It’s already a heavy lens given that it has a fixed focal length in the medium range and the fact that the front element looks tiny compared to the diameter of the whole lens.
The sharpness looks good as expected from a prime lens and event a FX lens on a crop sensor.
What might be a surprise to some people is that the lens actually isn’t F2.8 all the time. Starting from approx. 0.5 meters to near focusing distance the minimum aperture goes gradually up to F4.8. However, this is really no problem for these distances as the depth of field would be unbelievably narrow and focusing nearly impossible at F2.8.
As others have already pointed out, the lens hood is quite large and might get in the way for close macro work so that you have to remove it in this kind of situation.
Another nice feature is that is has a rubber at the lens mount for weather sealing.
]]>Of course I followed the advice to avoid strong light falling directly on the screen, but it seems that even the remaining ambient light in the room from a windows with closed curtains is too much, at least for the Spyder 4. So what I did was putting a thick black cloth on the screen (and the Spyder device) during the calibration run to shield it from all ambient light. And voilà, results are much more reasonable and consistent.
So, don’t underestimate the effect of ambient light on the monitor calibration. This seems to be especially true for glossy display types. In case of doubt, use a dark room or put a thick black cloth on the monitor during calibration.
]]>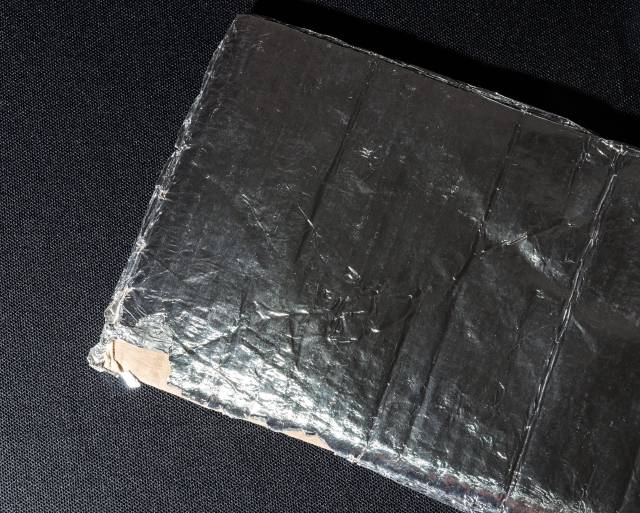
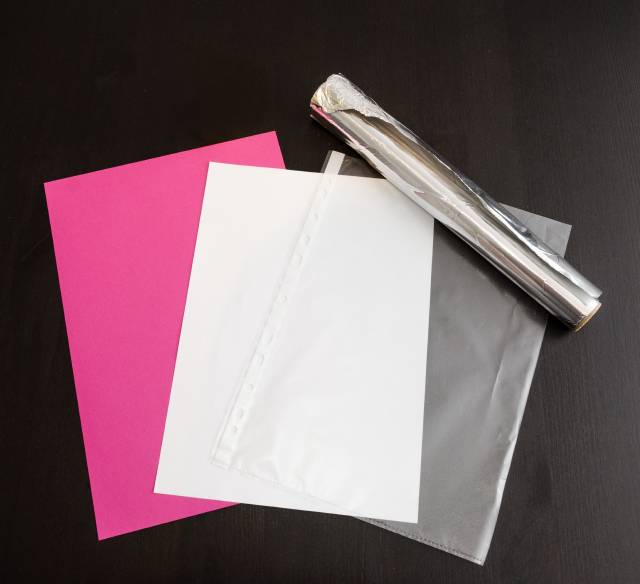
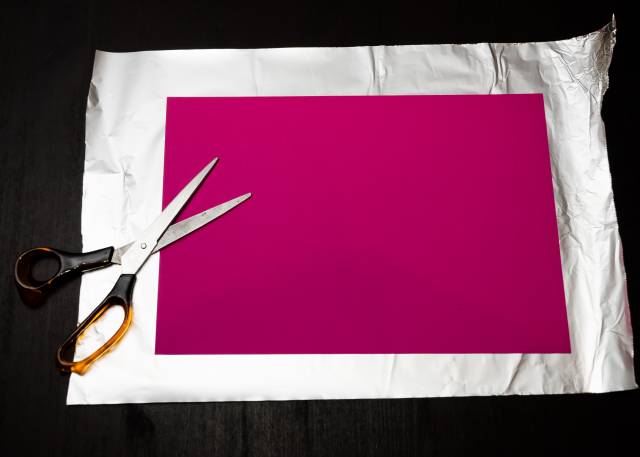
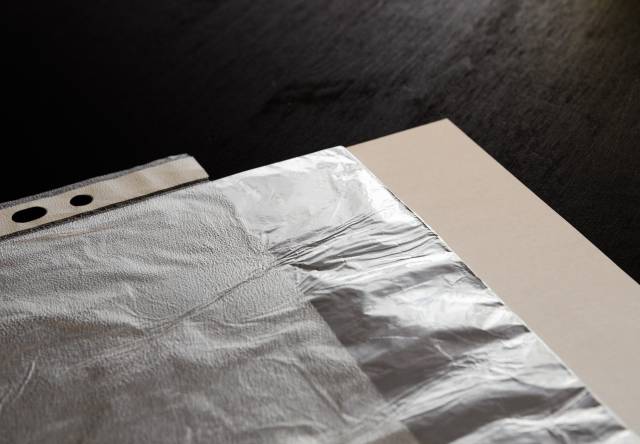
The solution I came up with is to us a transparent sheet protector (punched pocket) for carrying around the cardboard wrapped in aluminum foil. This way the reflector hopefully last longer. Along with the cardboard I also put a white paper into the sheet protector to have a second reflector type for some variation. Here is a short photo walk-through of the creation process:
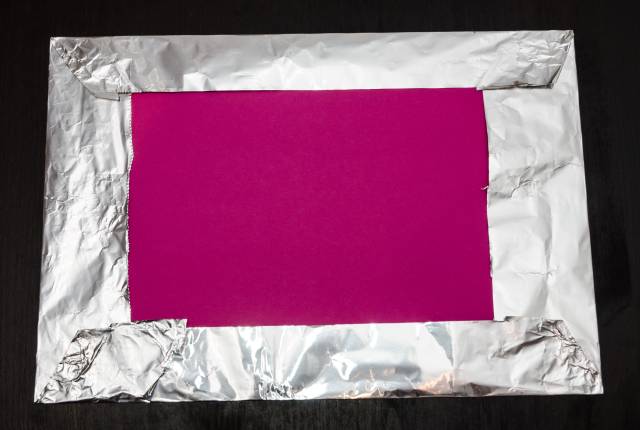
The resulting reflector fits easily into the pocket of my photo bag (Vanguard Up-Rise 33).

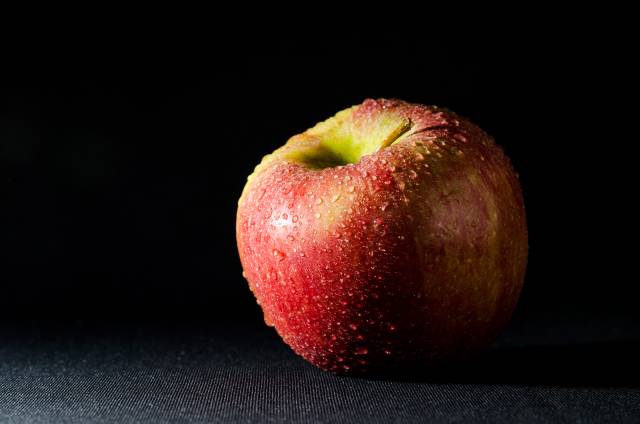
Here is a test shot I did with the reflector to show the effect of the two sides.
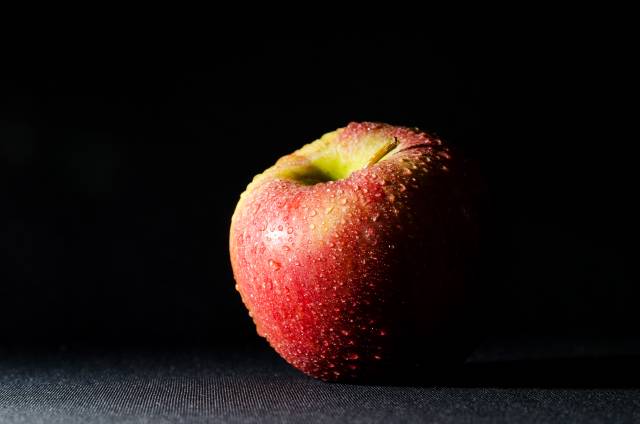
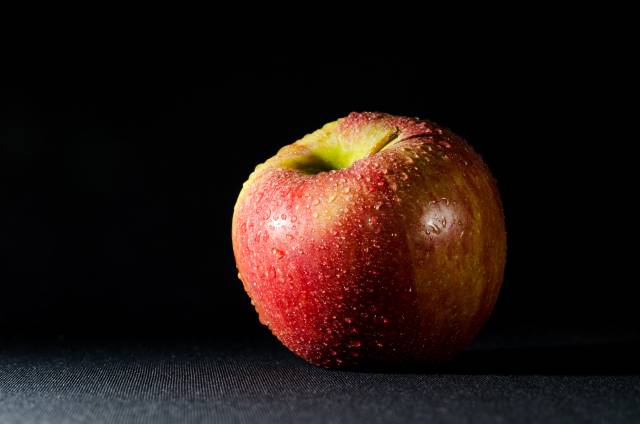
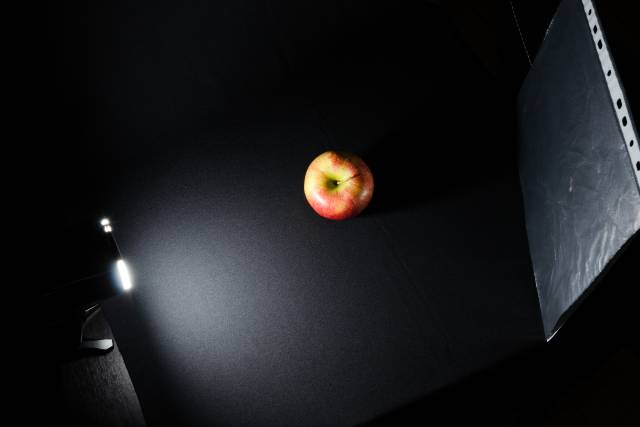
This was the setup used for the photos:
Of course it would have been much sharper and with less noise at lower ISO and I wouldn’t print this on a big canvas, but for internet use it works.
]]>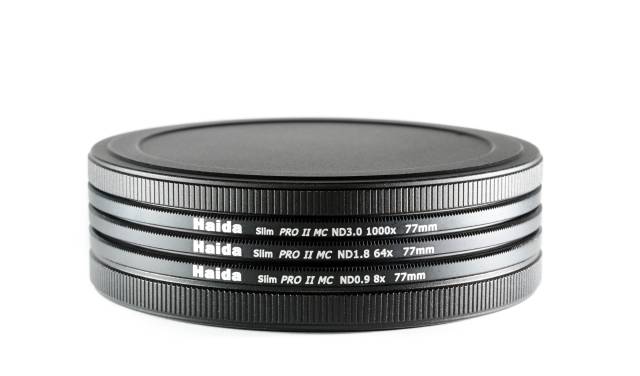
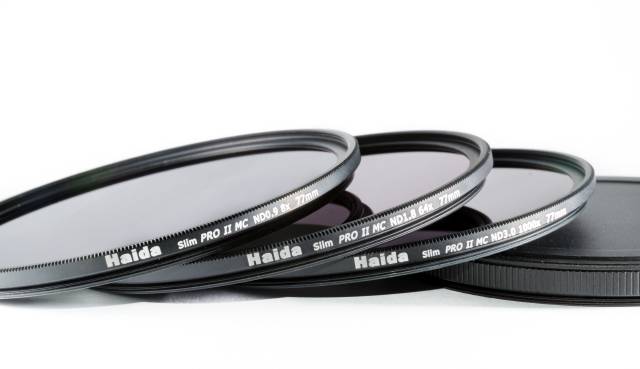
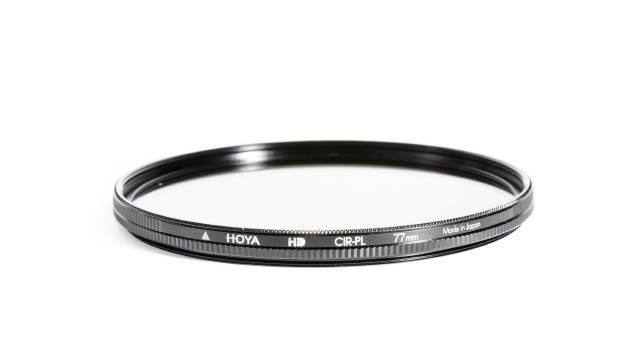
In addition to the ND filters I also bought a new polarizer. This time a bit more expensive: Hoya HD circular polarizer.
Now I only need good weather for the landscape work to start again. ;)
]]>